
Safflower Soirée: A Guide to Growing, Dyeing, and Seed Saving
The Versatility of Safflower
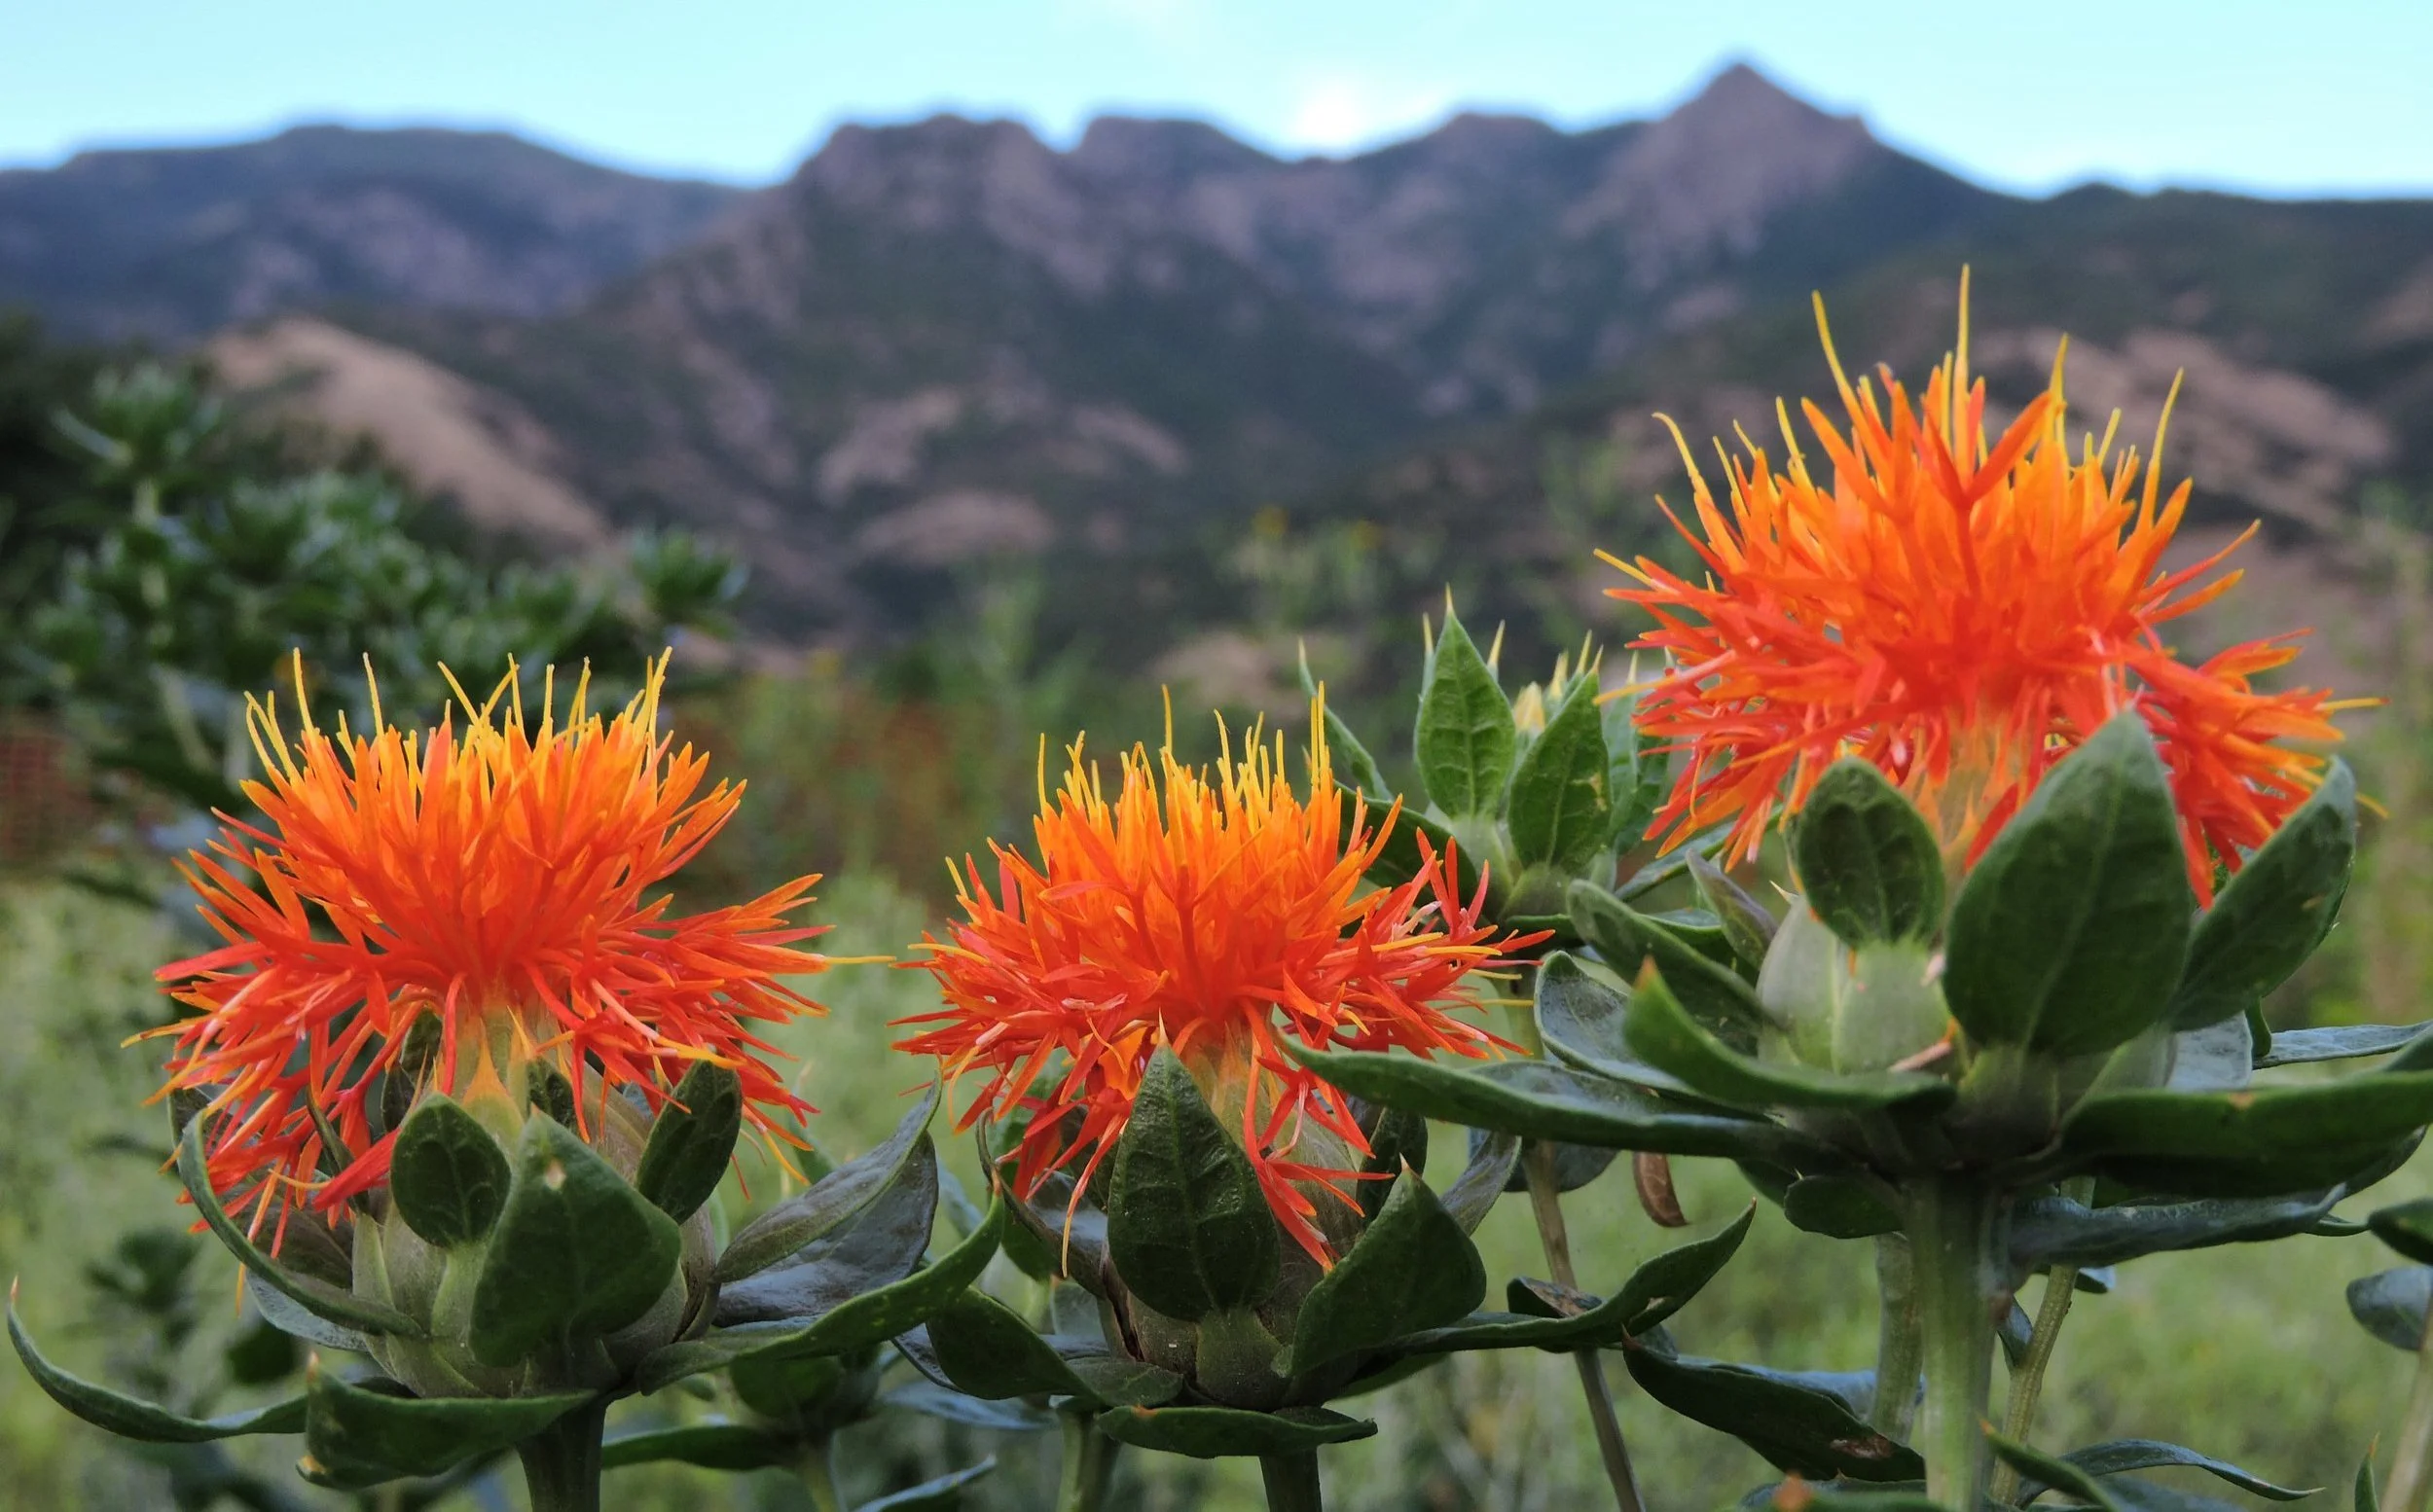
Safflower (Carthamus tinctorius) is a versatile summer annual with much to offer natural dyers, gardeners, and culinary enthusiasts. Its vivid blooms bring a bold splash of color to the garden, and its petals produce beautiful yellow, pink, and coral dyes.
Safflower’s appeal doesn’t end there. It also stands out in dried floral arrangements, and its petals can be used as a vibrant garnish or steeped into a calming herbal tea. In this blog post, we’ll explore the many uses of safflower, walk through how to grow it from seed, and share practical tips for saving seeds for future growing seasons.
A Rich Historical Background
Domesticated over 4,000 years ago in the Fertile Crescent, safflower is one of humanity’s oldest cultivated crops. The progenitor of this species has long been theorized to be Carthamus oxyacanthus, Carthamus palaestinus, or Carthamus persicus, all native to the region of domestication. Recent DNA sequencing, however, has identified Carthamus palaestinus as safflower’s closest living relative.
From its origins in the Fertile Crescent, safflower's extreme adaptability allowed it to quickly traverse the Silk Road, evolving into a vital oil and dye crop from the Mediterranean to Japan. In Japan, its blooms were so highly valued that one of the 72 kō (the delicate micro-seasons in the traditional calendar) was named in honor of safflower (紅花栄 Benibana sakau: Safflowers bloom), showcasing its cultural significance. In ancient Egypt, royalty adorned themselves with safflower-dyed fibers for the afterlife, while in India, safflower has long been celebrated as an important Ayurvedic herb for healing.
In Northern Utah, where Grand Prismatic Seed is located, safflower has emerged as a crucial low-water rotational crop, promoting soil health between seasons of winter wheat.
It’s truly awe-inspiring to reflect on how some carefully selected and nurtured seeds from Carthamus palaestinus evolved into the resilient and versatile Carthamus tinctorius, enriching countless cultures and lives along the way. By growing and saving your own safflower seeds, you can join this beautiful dance between seeds and people, continuing the legacy of this remarkable plant.
GROWING SAFFLOWER FROM SEED
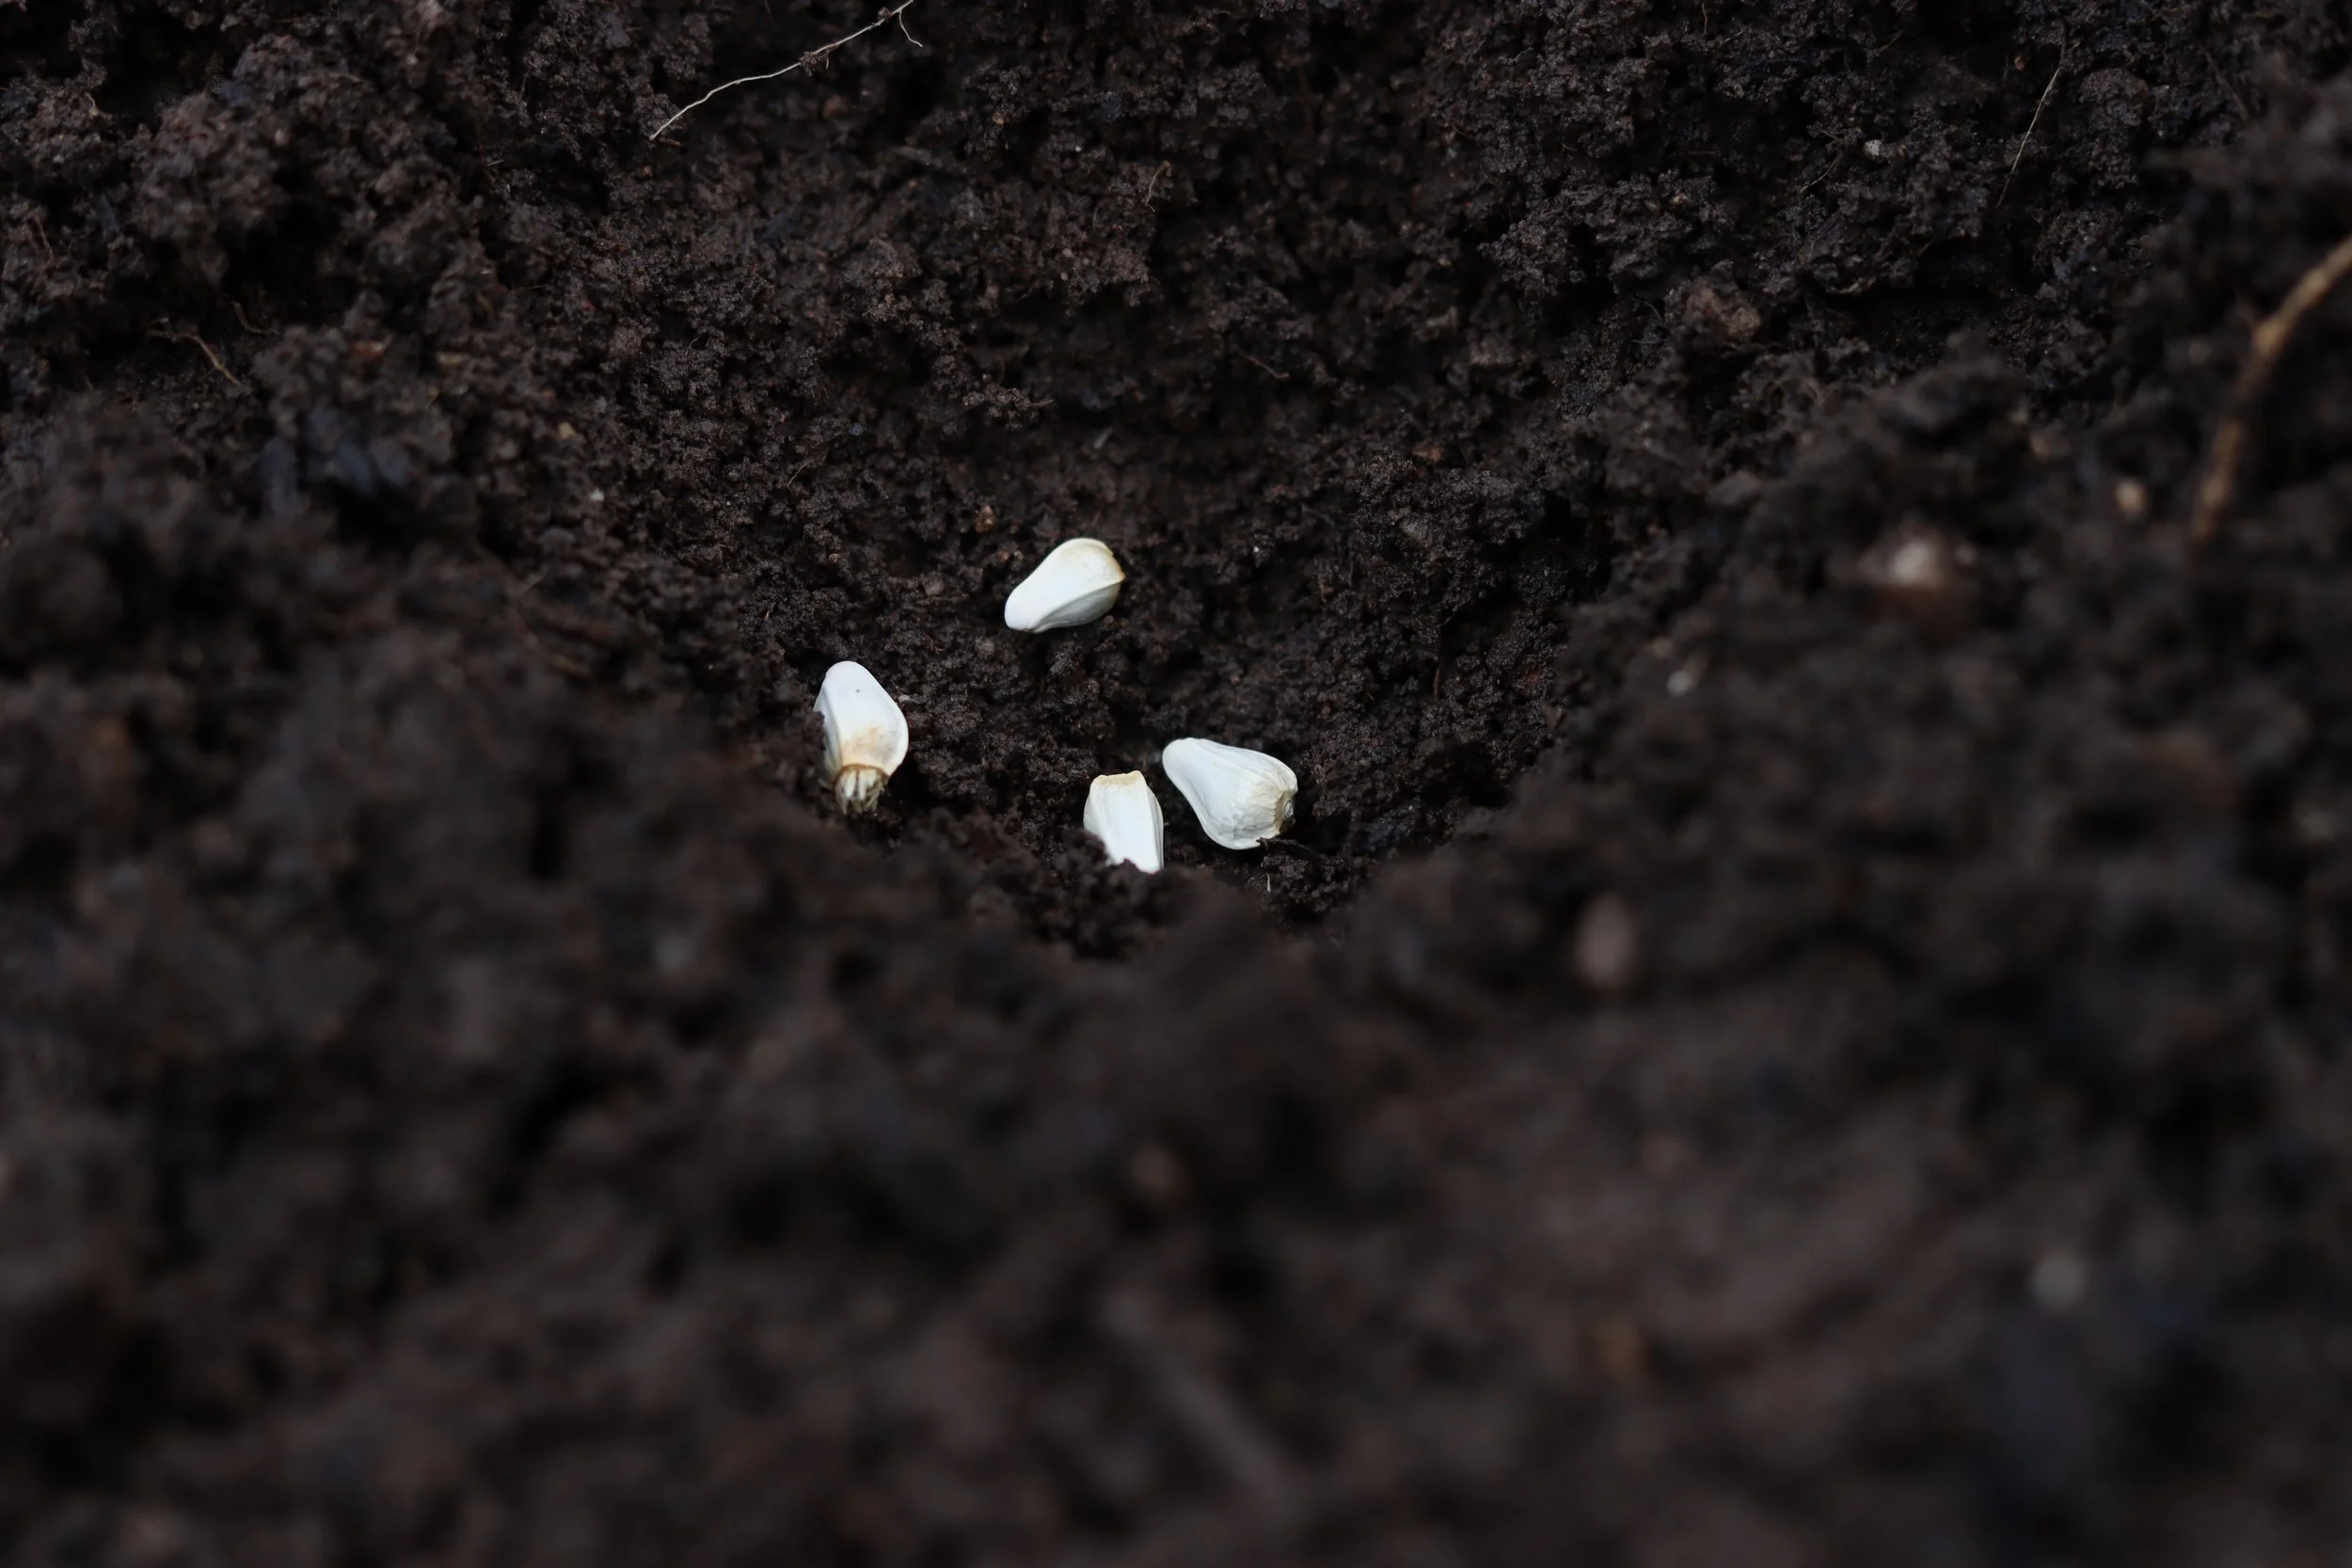
Above: Safflower seeds getting tucked into their new home
Like many long-domesticated plants, safflower is an extremely easy and reliable plant to grow from seed. Centuries of domestication have removed natural germination inhibitors, making safflower quick to sprout when supplied with water and warm soil.
Best Time to Plant Safflower Seeds
We recommend direct sowing safflower seeds into well-weeded garden beds in late spring or early summer, once your soil has warmed up. Safflower develops a robust taproot, making it best suited for direct sowing rather than transplanting. If you choose to transplant, be cautious not to disturb the taproot, as this can hinder the plant's growth.
Ideal Growing Conditions for Safflower
Safflower thrives in hot sunny environments, so select a location in your garden that receives plenty of light. This hardy plant prefers well-draining soils and requires minimal supplemental nutrition to flourish, thanks in part to its long taproot, which can mine nutrients from deeper soil layers. Avoid planting in waterlogged soils, or areas with excessive shade.
Planting Instructions
For best results, sow safflower seeds in groups of 2 to 4 seeds, spacing each group 10 to 12 inches apart and planting them about 1/4 inch deep. Keep the soil consistently moist during germination, which usually occurs within 7 to 10 days. Once the seedlings emerge, thin each group to leave the strongest looking plant.
In recent years, we’ve faced some challenges with snails and slugs feeding on young safflower sprouts. To give our plants a better chance, we delay thinning until the seedlings are vigorous enough to withstand early pest pressure. In our region, we typically direct sow after Mother’s Day and have successfully planted as late as the final week of June and still enjoyed blooms before our first frost.
For more information on starting seeds for a dye garden, check out our blog post Sow the Spectrum: Starting a Dye Garden From Seed.
HARVESTING SAFFLOWER PETALS
Harvesting Dried Petals from the Plant
In dry climates like ours, one of the best methods for gathering safflower petals is to wait until the flowers have dried on the plant. This approach not only allows you to collect the petals but also ensures you can harvest mature safflower seeds later on, as the dried flowers indicate successful pollination (we’ll cover seed saving in the next section).
Harvesting Entire Flower Heads
Alternatively, you can harvest the entire seed heads while the flowers are still attracting pollinators or after they’ve finished blooming. After cutting the seed heads, place them in a dry location to allow the petals to dry fully before storing. This method may encourage the plant to produce more blooms; however, remember that you may not be able to collect seeds from these cut heads, as they will not have fully matured yet.
Tips for Humid Climates
If you live in a humid climate, consider using a food dehydrator set to the lowest temperature to dry your safflower flowers before storage. This will help preserve their quality, vibrant color, and extend their longevity, ensuring your safflower petals are ready for all your creative uses. After your flowers are dry, store them in an airtight container to prevent them from reabsorbing moisture.


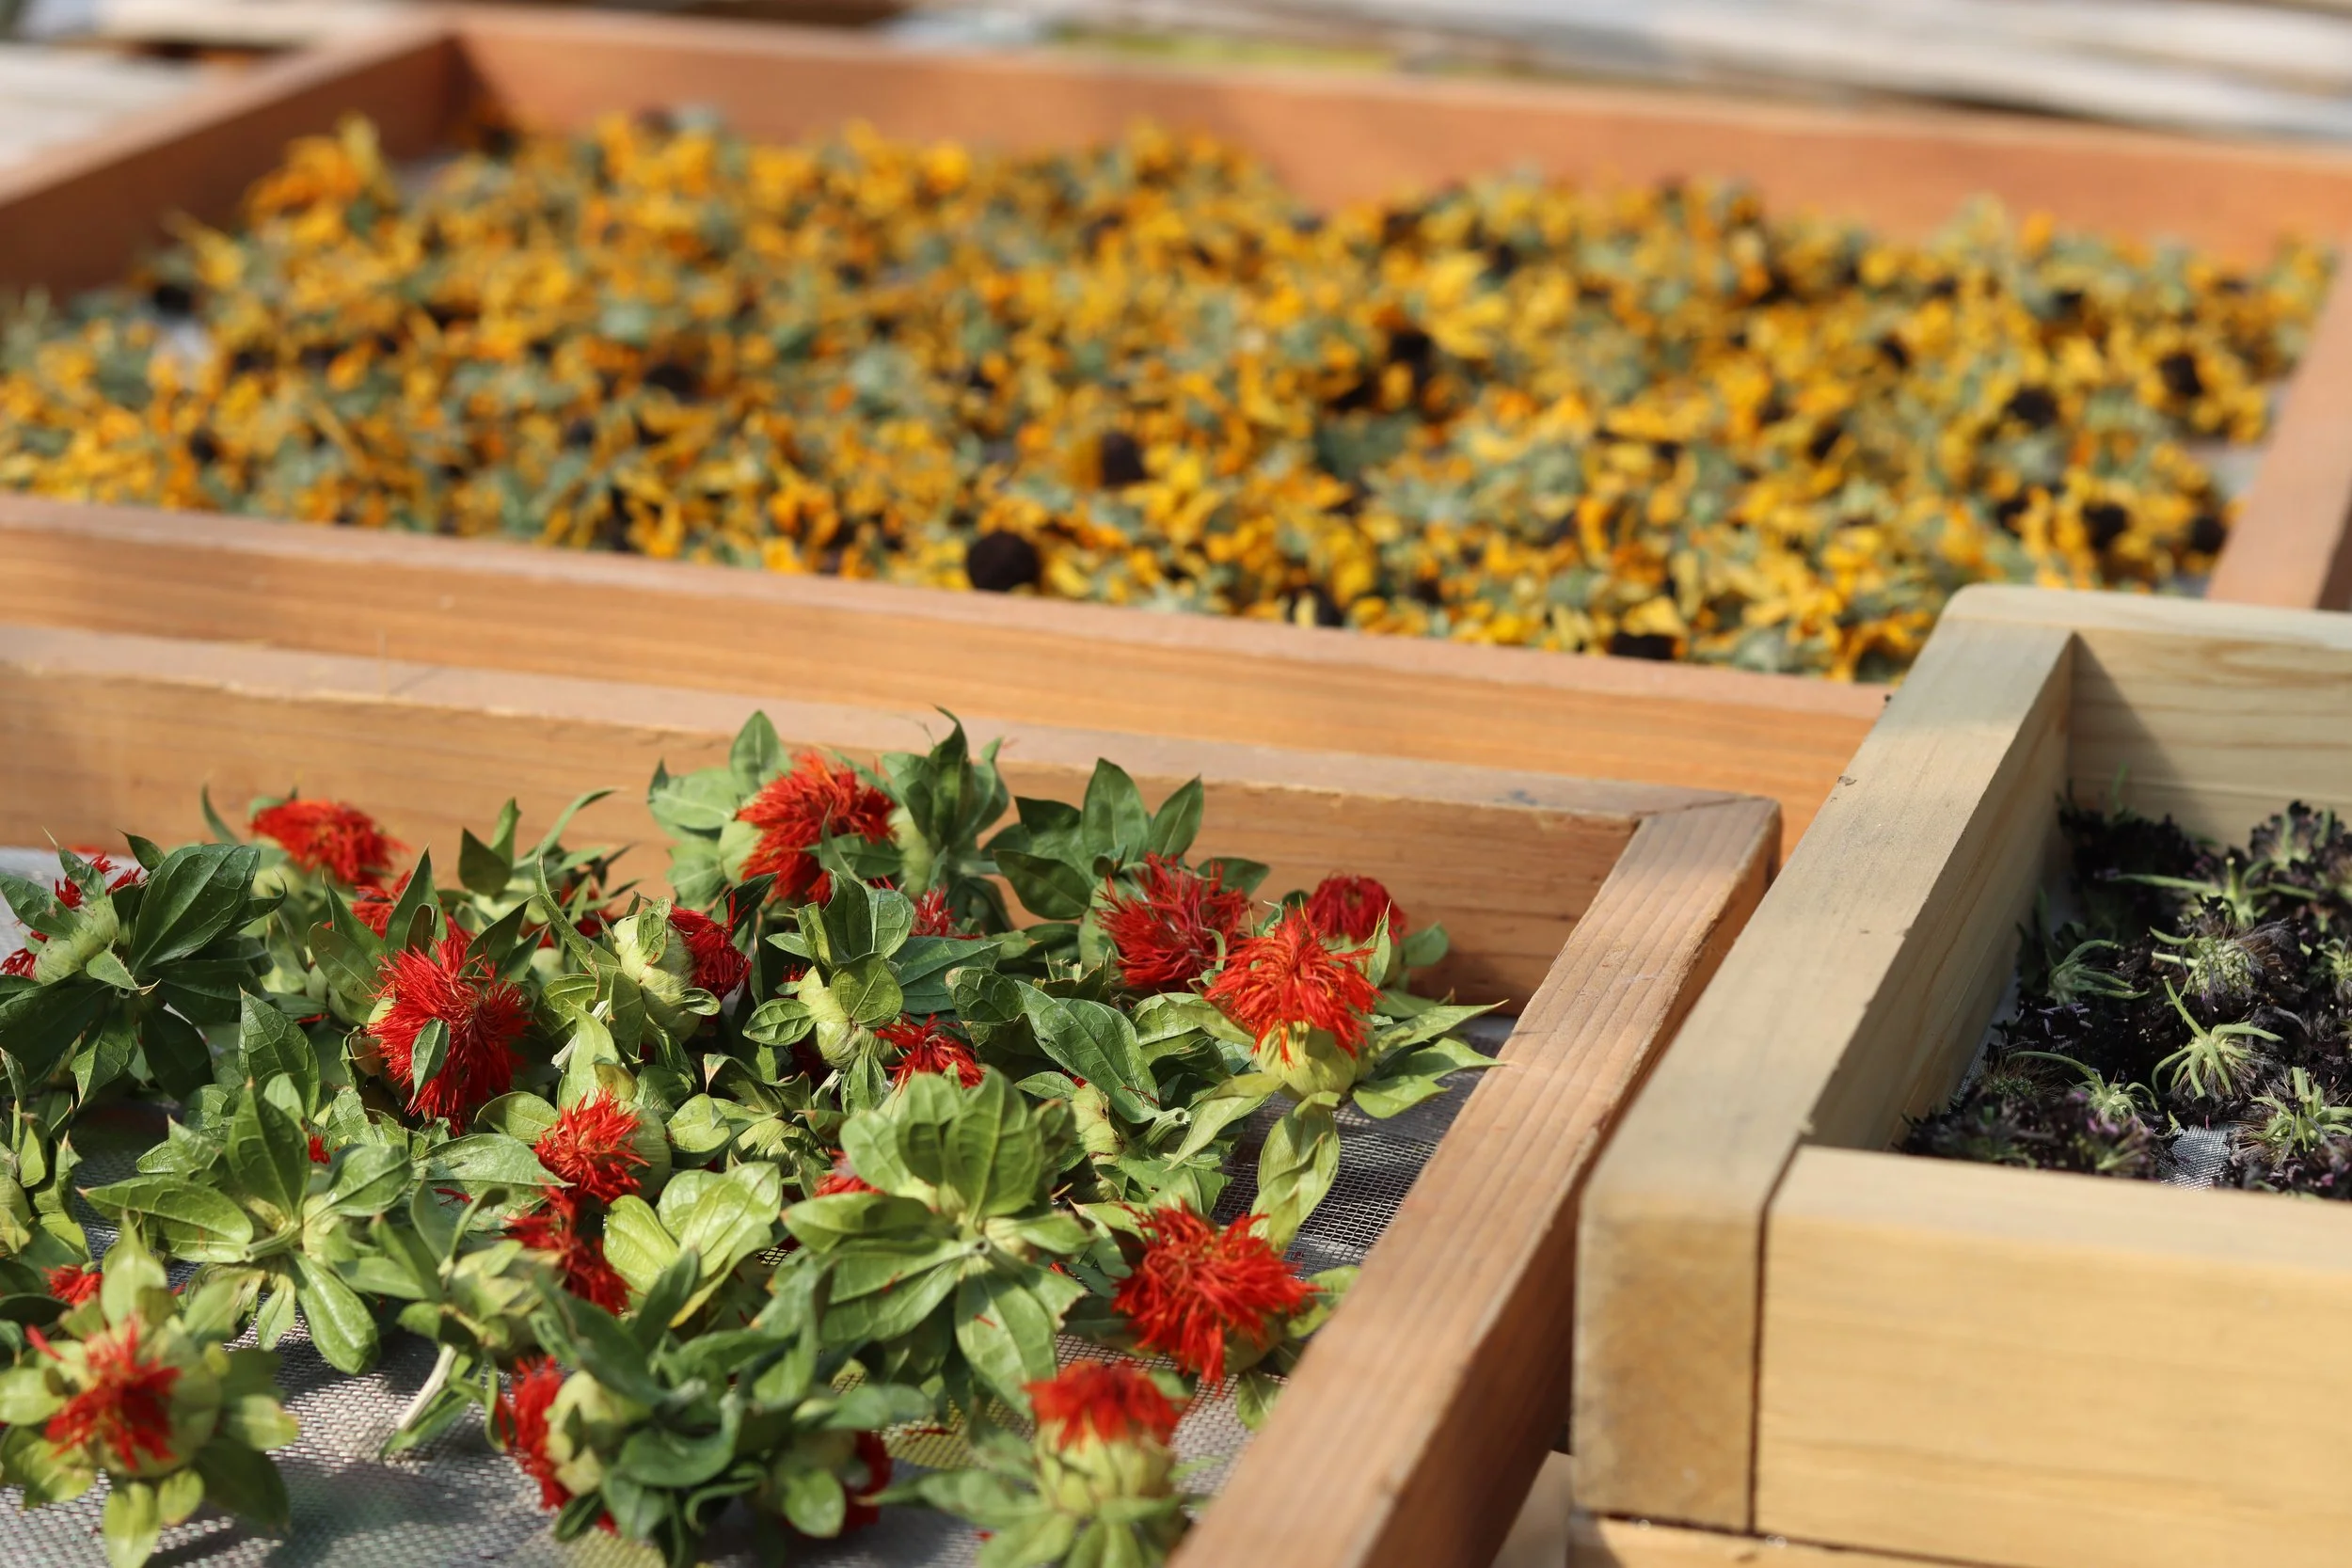
Left: When flowers are still fresh, you can harvest the entire flower head to dry indoors and remove the petals later. This approach may encourage the plant to put on a few additional blooms and is especially useful if extended rainy weather is in the forecast, as too much moisture can cause dry petals to mold.
Right: Our preferred method is to harvest petals after pollination, once they’ve naturally dried on the plant. You’ll know they are finished pollinating and ready for harvest when they are reddish orange and crispy. The variety of safflower we grow has fewer spines than many varieties, but gloves still make the job more comfortable. If you’re harvesting by hand, it may take a few tries to find the right angle to pluck the petals without getting poked. In our climate, harvesting on a sunny day ensures the petals are dry enough to go straight into an airtight container for long-term storage.
Above: Whole flower heads drying on a summer afternoon. These flower heads were harvested early as we noticed rain in the forecast, and didn’t have time to hand harvest all of the petals. We quickly cut off the heads to process at a later date.
SAVING SEEDS FROM SAFFLOWER PLANTS

Above: A safflower seed head that is ripe and ready to be harvested for seed
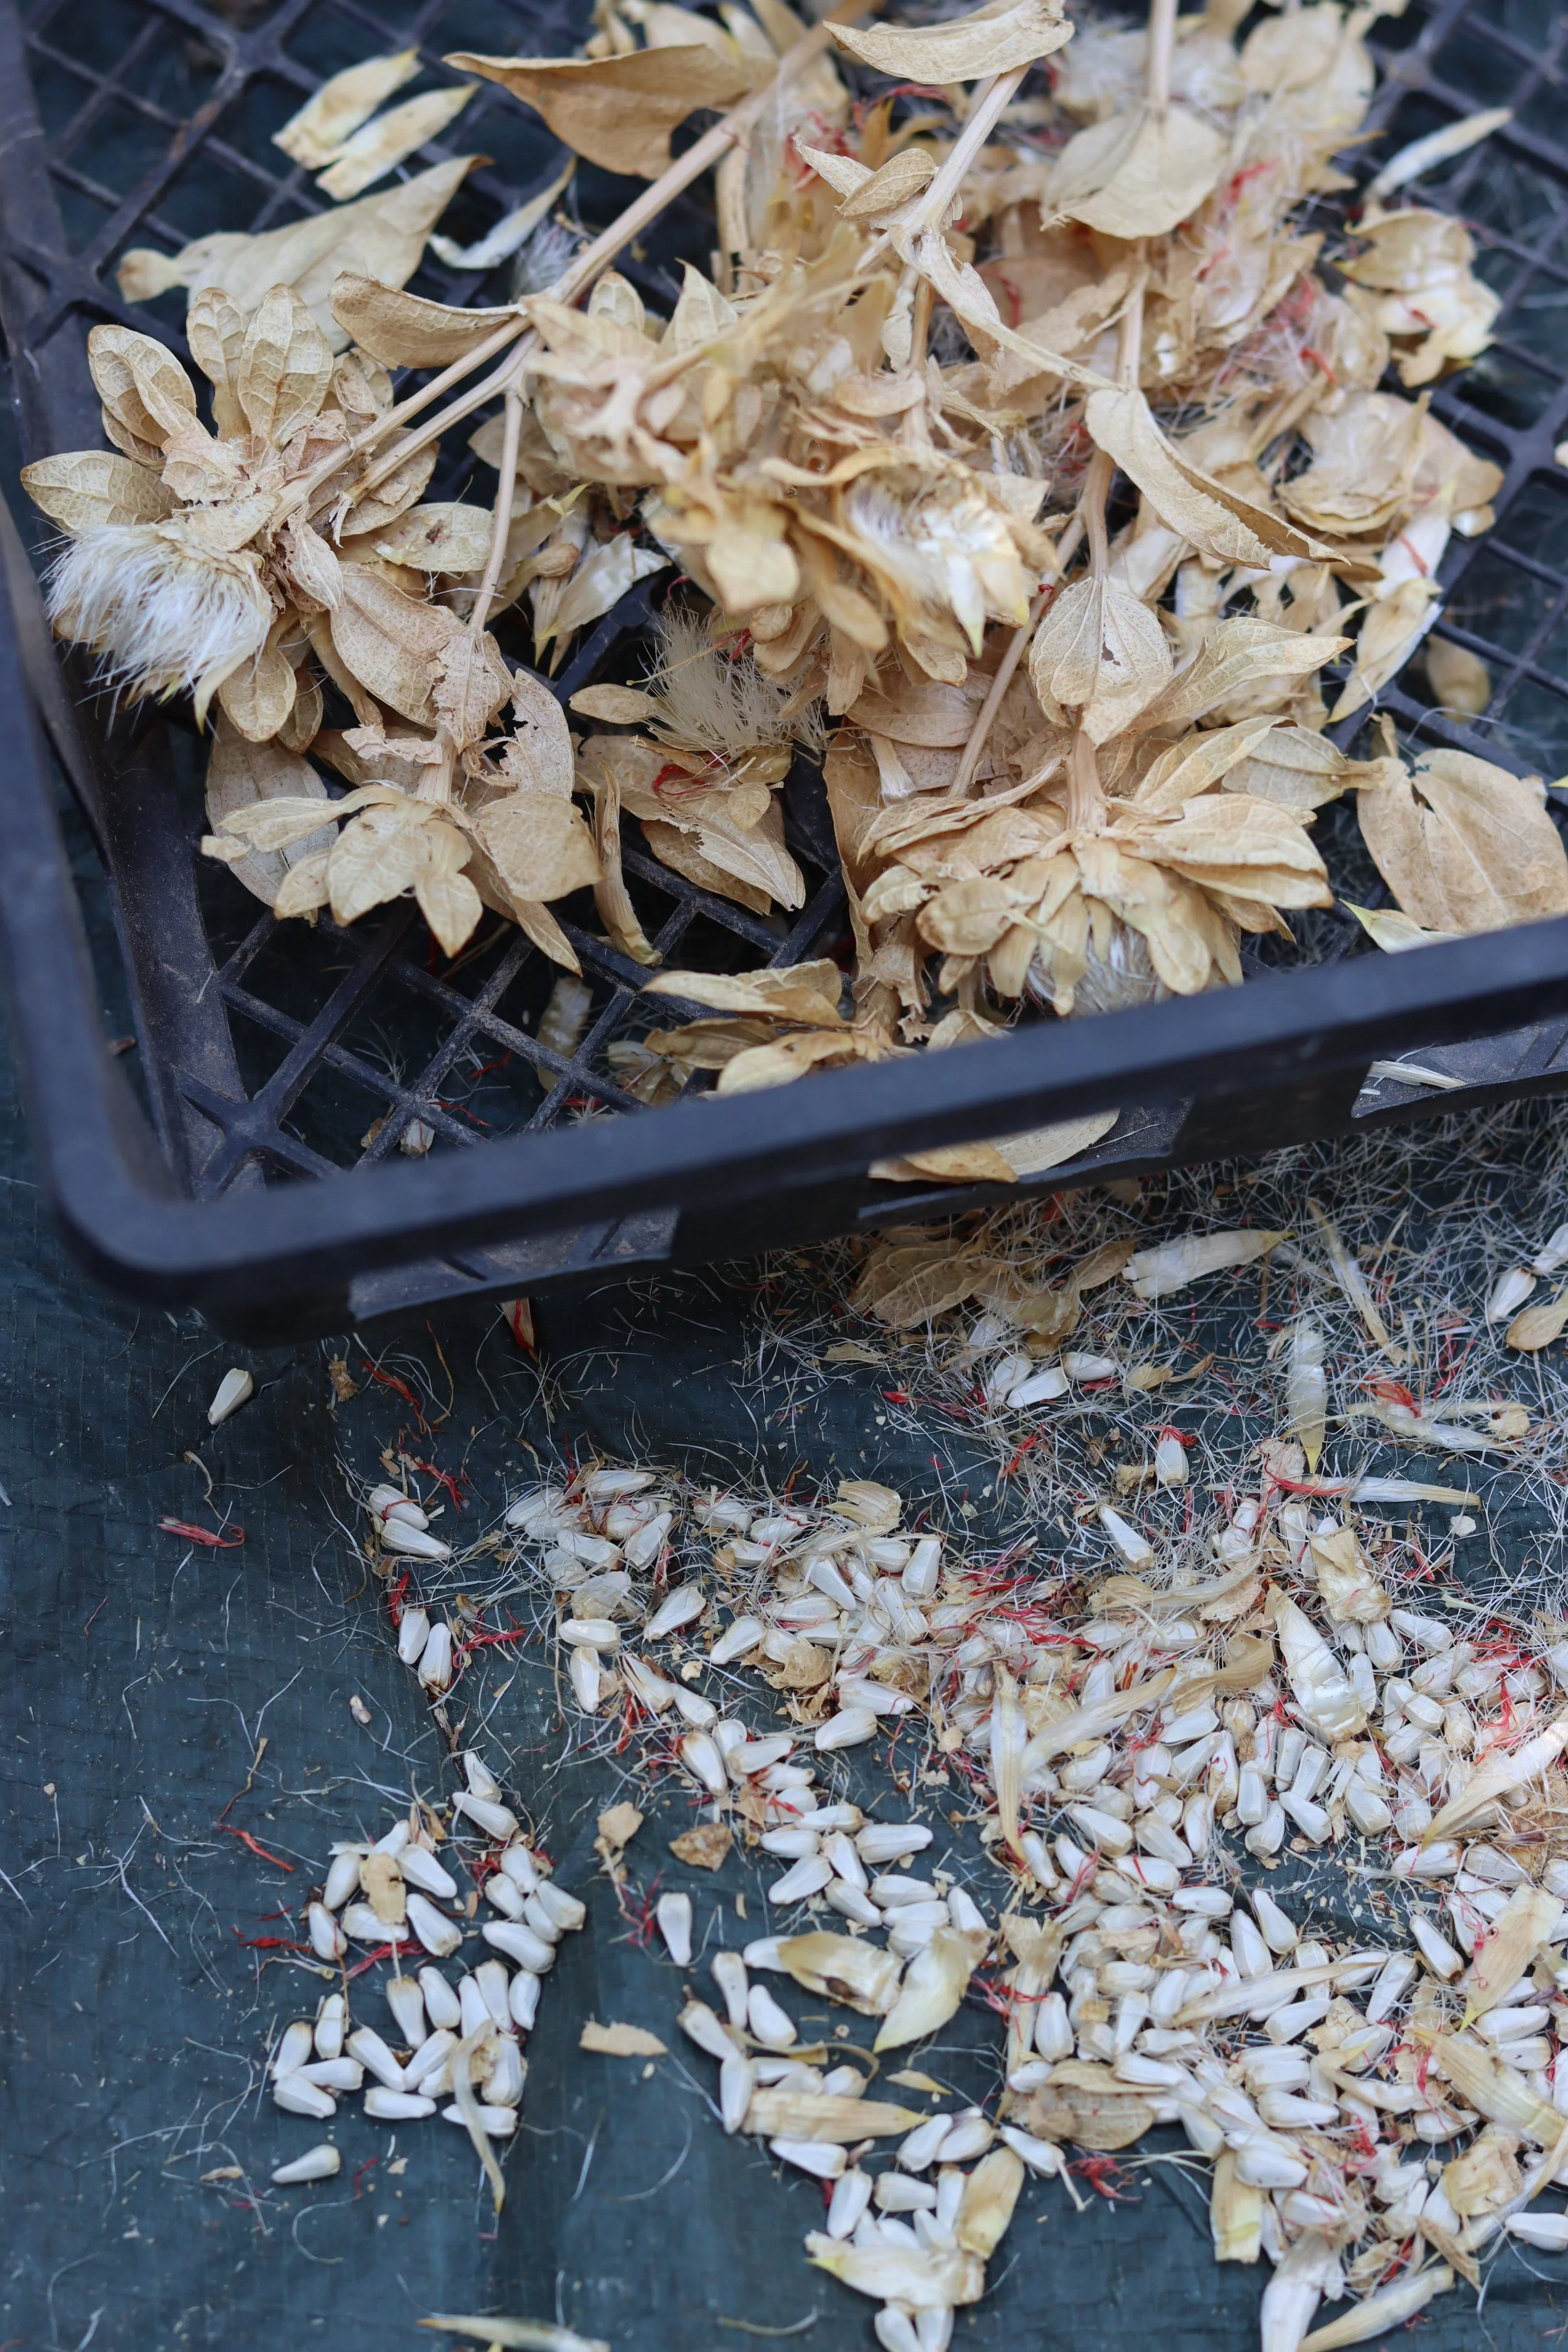
Safflower is a great gateway plant for seed-saving! The large seeds make them extremely easy to screen and winnow. When your safflower seed heads are dry and have turned from green to tan, you know that they are ready for harvest. You can cut individual heads or whole plants, and then lay them on a surface that allows for easy clean up after threshing (a tarp, some fabric, or for smaller harvests, put them in a plastic tote). We like to harvest ours onto a tarp. After the seed heads are harvested, our favorite method of threshing is to gently stomp them with our feet. You want to be firm enough to break up the seed head, but gentle enough to avoid crushing seeds. If you are nervous about how much pressure to apply, you can put your tarp on a grassy area, which will provide more padding for the seeds than if you thresh on concrete. The seeds will come out of the plant very easily if the plant material is adequately dried. If you live in a humid area, it can be harder to thresh in the morning when plant materials have more moisture. If this is the case for you, place your plant material in the sun for a few hours mid-day to crisp it up.
After you’ve threshed your crop, pass the material through a screen with large holes to get large chunks of plant debris removed. A daisy tray for holding a seed flat (pictured at the bottom of this section) is a great size for removing large material. You can also use a large-holed colander that allows seeds to pass through.

Above: Left side is waiting to be threshed, right side is threshed and ready to be screened and winnowed.
Once you’ve screened out the biggest chunks of chaff, it’s time to winnow! Using a box fan or a windy day, slowly pour your seeds from one container to another (back and forth), allowing the wind or fan to blow chaff away from your seeds. Because safflower seeds are so large and heavy, winnowing is relatively easy. Once your seeds are threshed, screened, and winnowed, store them in an airtight container in a cool and dry location away from direct sunlight. When stored well, they will maintain a high germination rate for many years.


DYEING WITH SAFFLOWER
Unlike most botanical immersion dyes, safflower allows for pigment extraction at room temperature; no heat is needed to access either the yellow or red dyes. However, to reach the red pigment (carthamin), which produces pink and coral shades, the yellow flavonoids must first be removed through a soak in room-temperature water. We’ve separated the yellow and red dye processes in the following sections for clarity.
Carthamin is especially notable for its ability to dye cellulose fibers and silk without the use of heat or a mordant. This is an uncommon feature among natural dyes and makes it particularly well-suited for low-impact, plant-based dyeing methods.
Because extracting red from safflower requires a relatively large quantity of petals (especially for achieving saturated pinks) it’s helpful to plan for a generous harvest. A good starting ratio is 100–200% the weight of fiber (WOF) in dried petals. If your yield is limited, begin with a smaller project like a handkerchief or bandana. You can also stretch your pigment further with surface design techniques like resist dyeing.
And if, by the end of the season, you find you haven’t harvested enough for a full dye bath, don’t worry—there are still plenty of ways to make the most of your safflower blooms. At the end of this post, we share a few ideas for using smaller harvests.
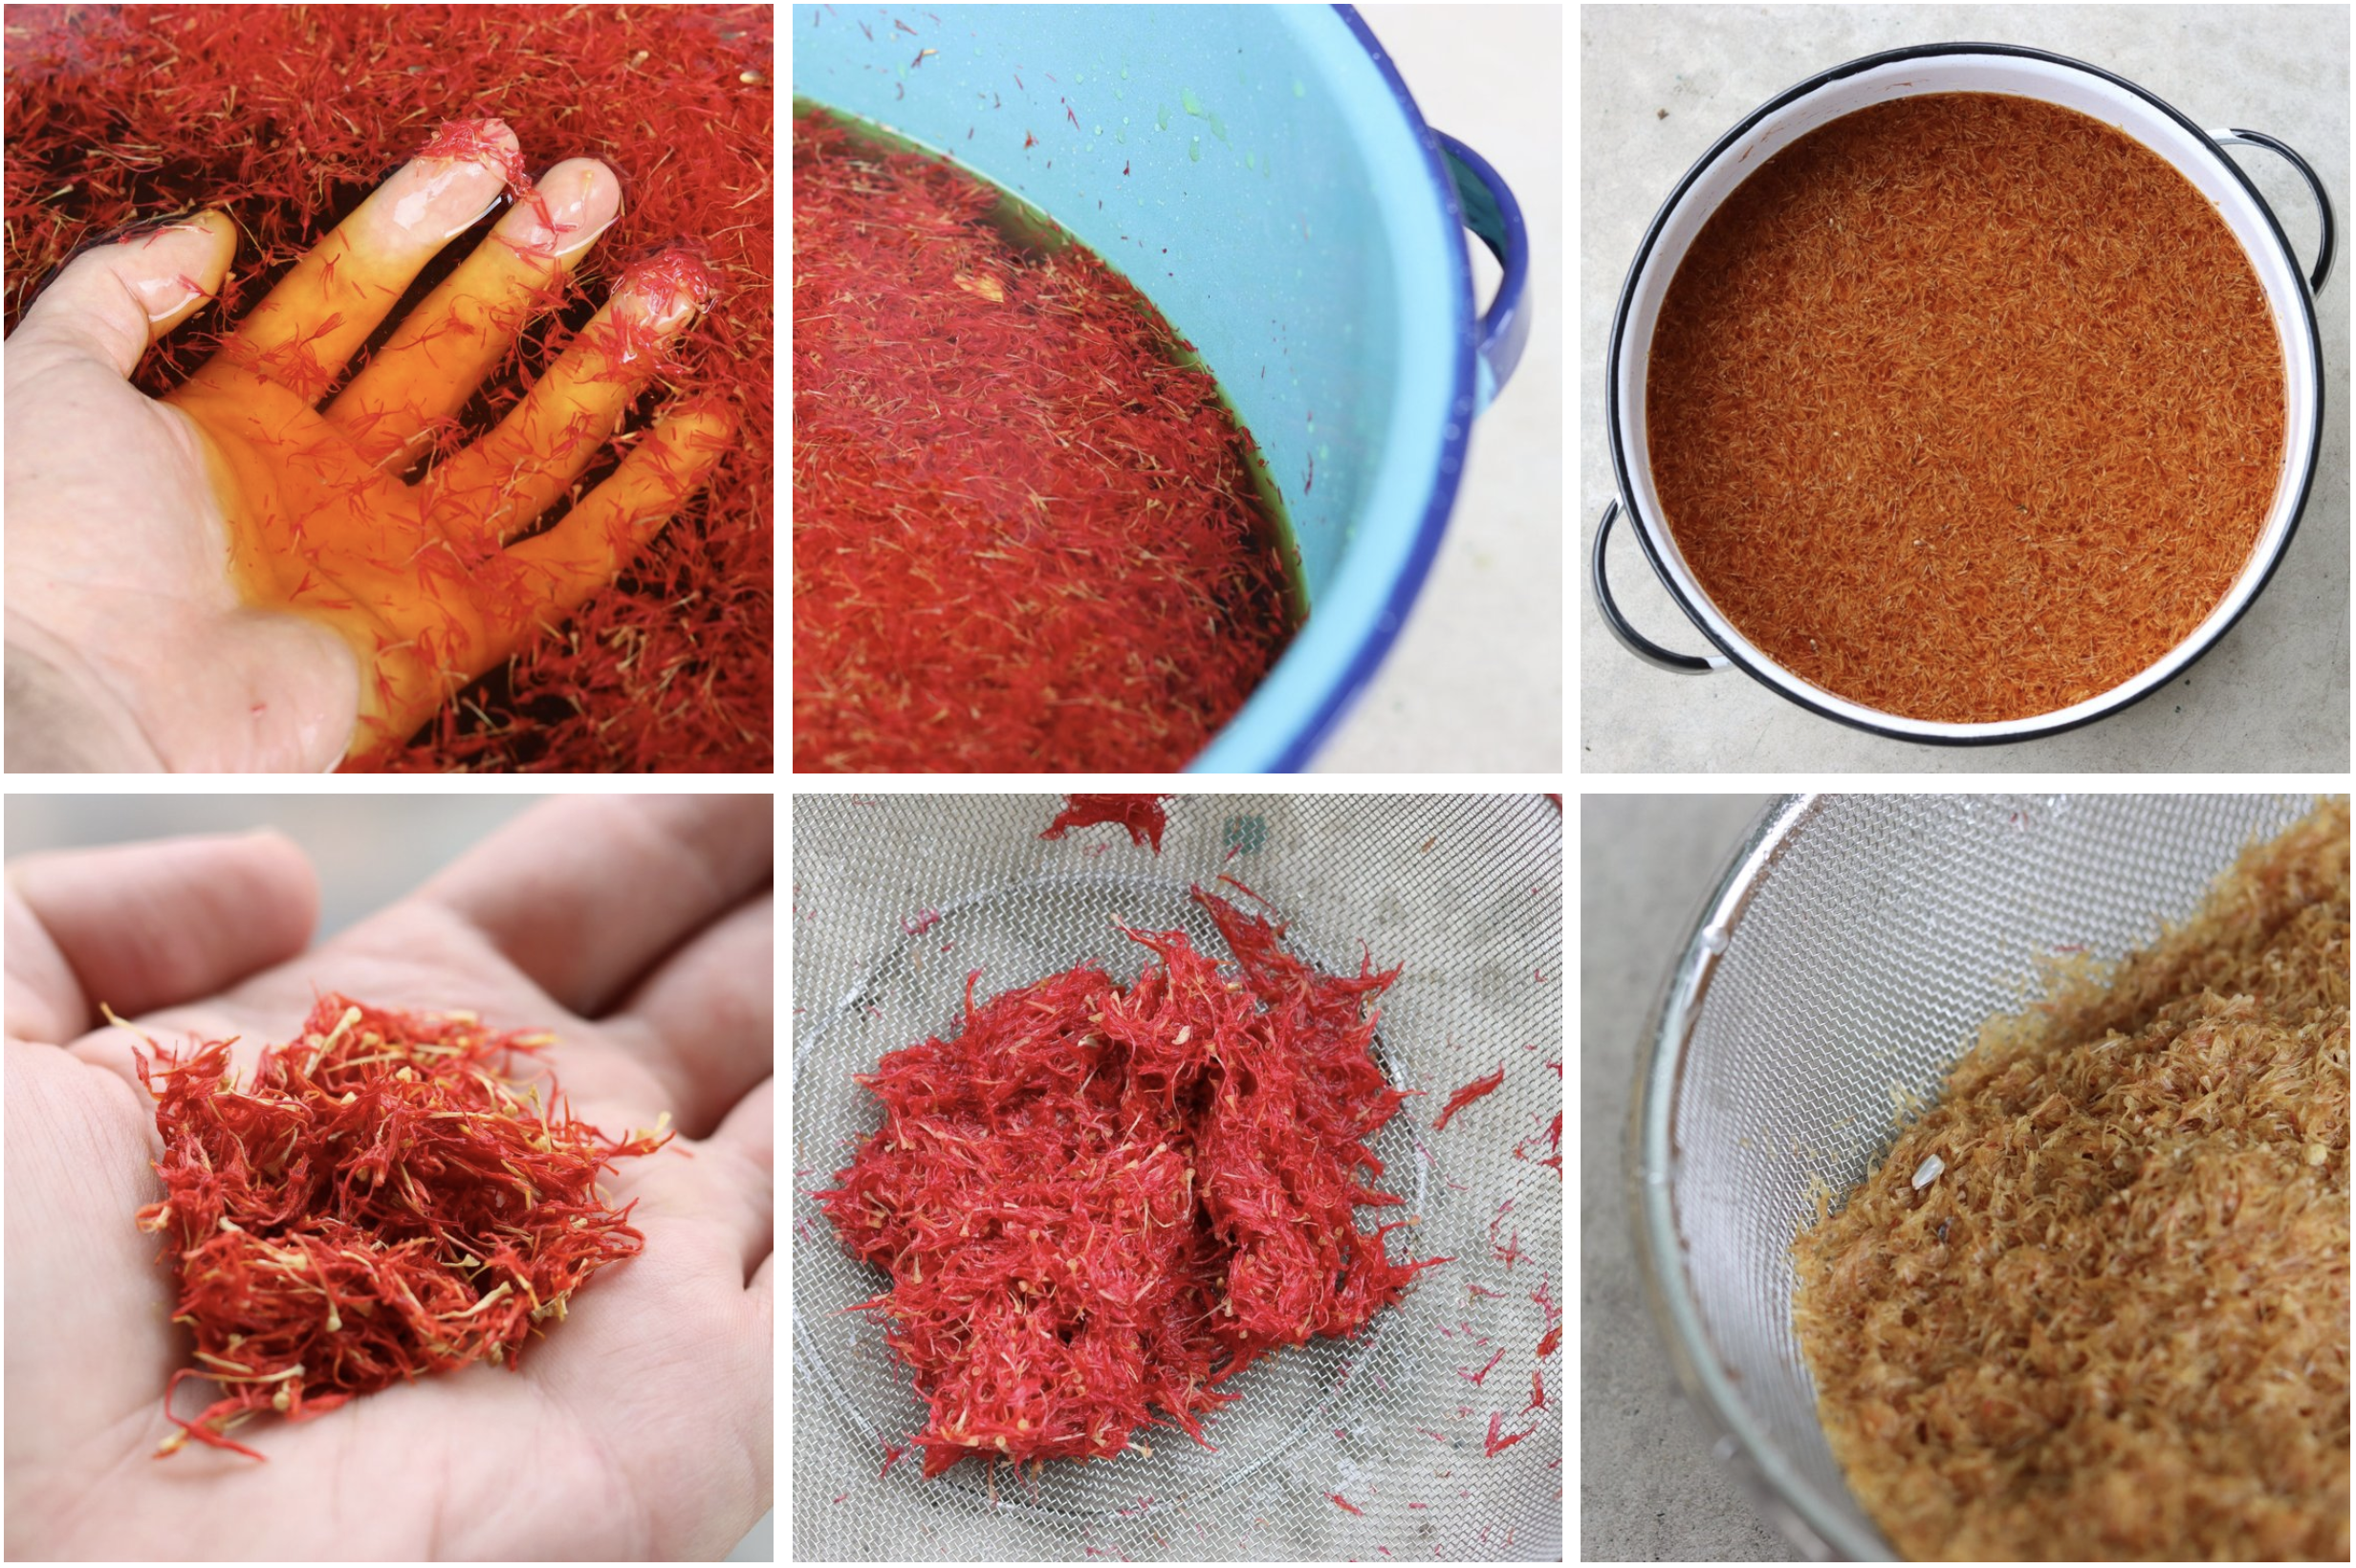
Above: As you extract yellow and red dyes from safflower petals, their changing color can help you gauge how much pigment can still be extracted:
Left Column: These orange-red petals have been soaking in room-temperature water to extract the yellow pigments, which are water-soluble flavonoids. The yellow-orange tint of the petals indicates that there is still some yellow dye to extract. Continue soaking until the color becomes more of a reddish orange.
Middle Column: The petals have shifted to a red-orange hue, indicating that most of the yellow pigment has been removed. At this point, you can set the yellow dye to the side for dyeing, and begin extracting the red carthamin, by placing the petals in an alkaline solution (details further below).
Right Column: After extracting the carthamin, the petals turn a dull tan color. At this stage, the petals have no more dye to offer and can be composted.
DYEING NATURAL FIBERS YELLOW WITH SAFFLOWER


Yellow DYE Extraction
To extract the yellow pigments from safflower petals, start by soaking the dried petals in a large container of room-temperature water—no heat is necessary for this process. We typically use a 34-quart enamelware pot. One overnight soak is usually enough to draw out the yellow flavonoids, but some dyers prefer several shorter soaks, changing the water between each one. If you go this route, it's best to use only the first and second extractions for your yellow dye bath, as later soaks tend to yield a weaker, more diluted solution. If you don’t have a large enough vessel for a single soak, multiple soaks with fresh water will allow you to extract the yellow pigment.
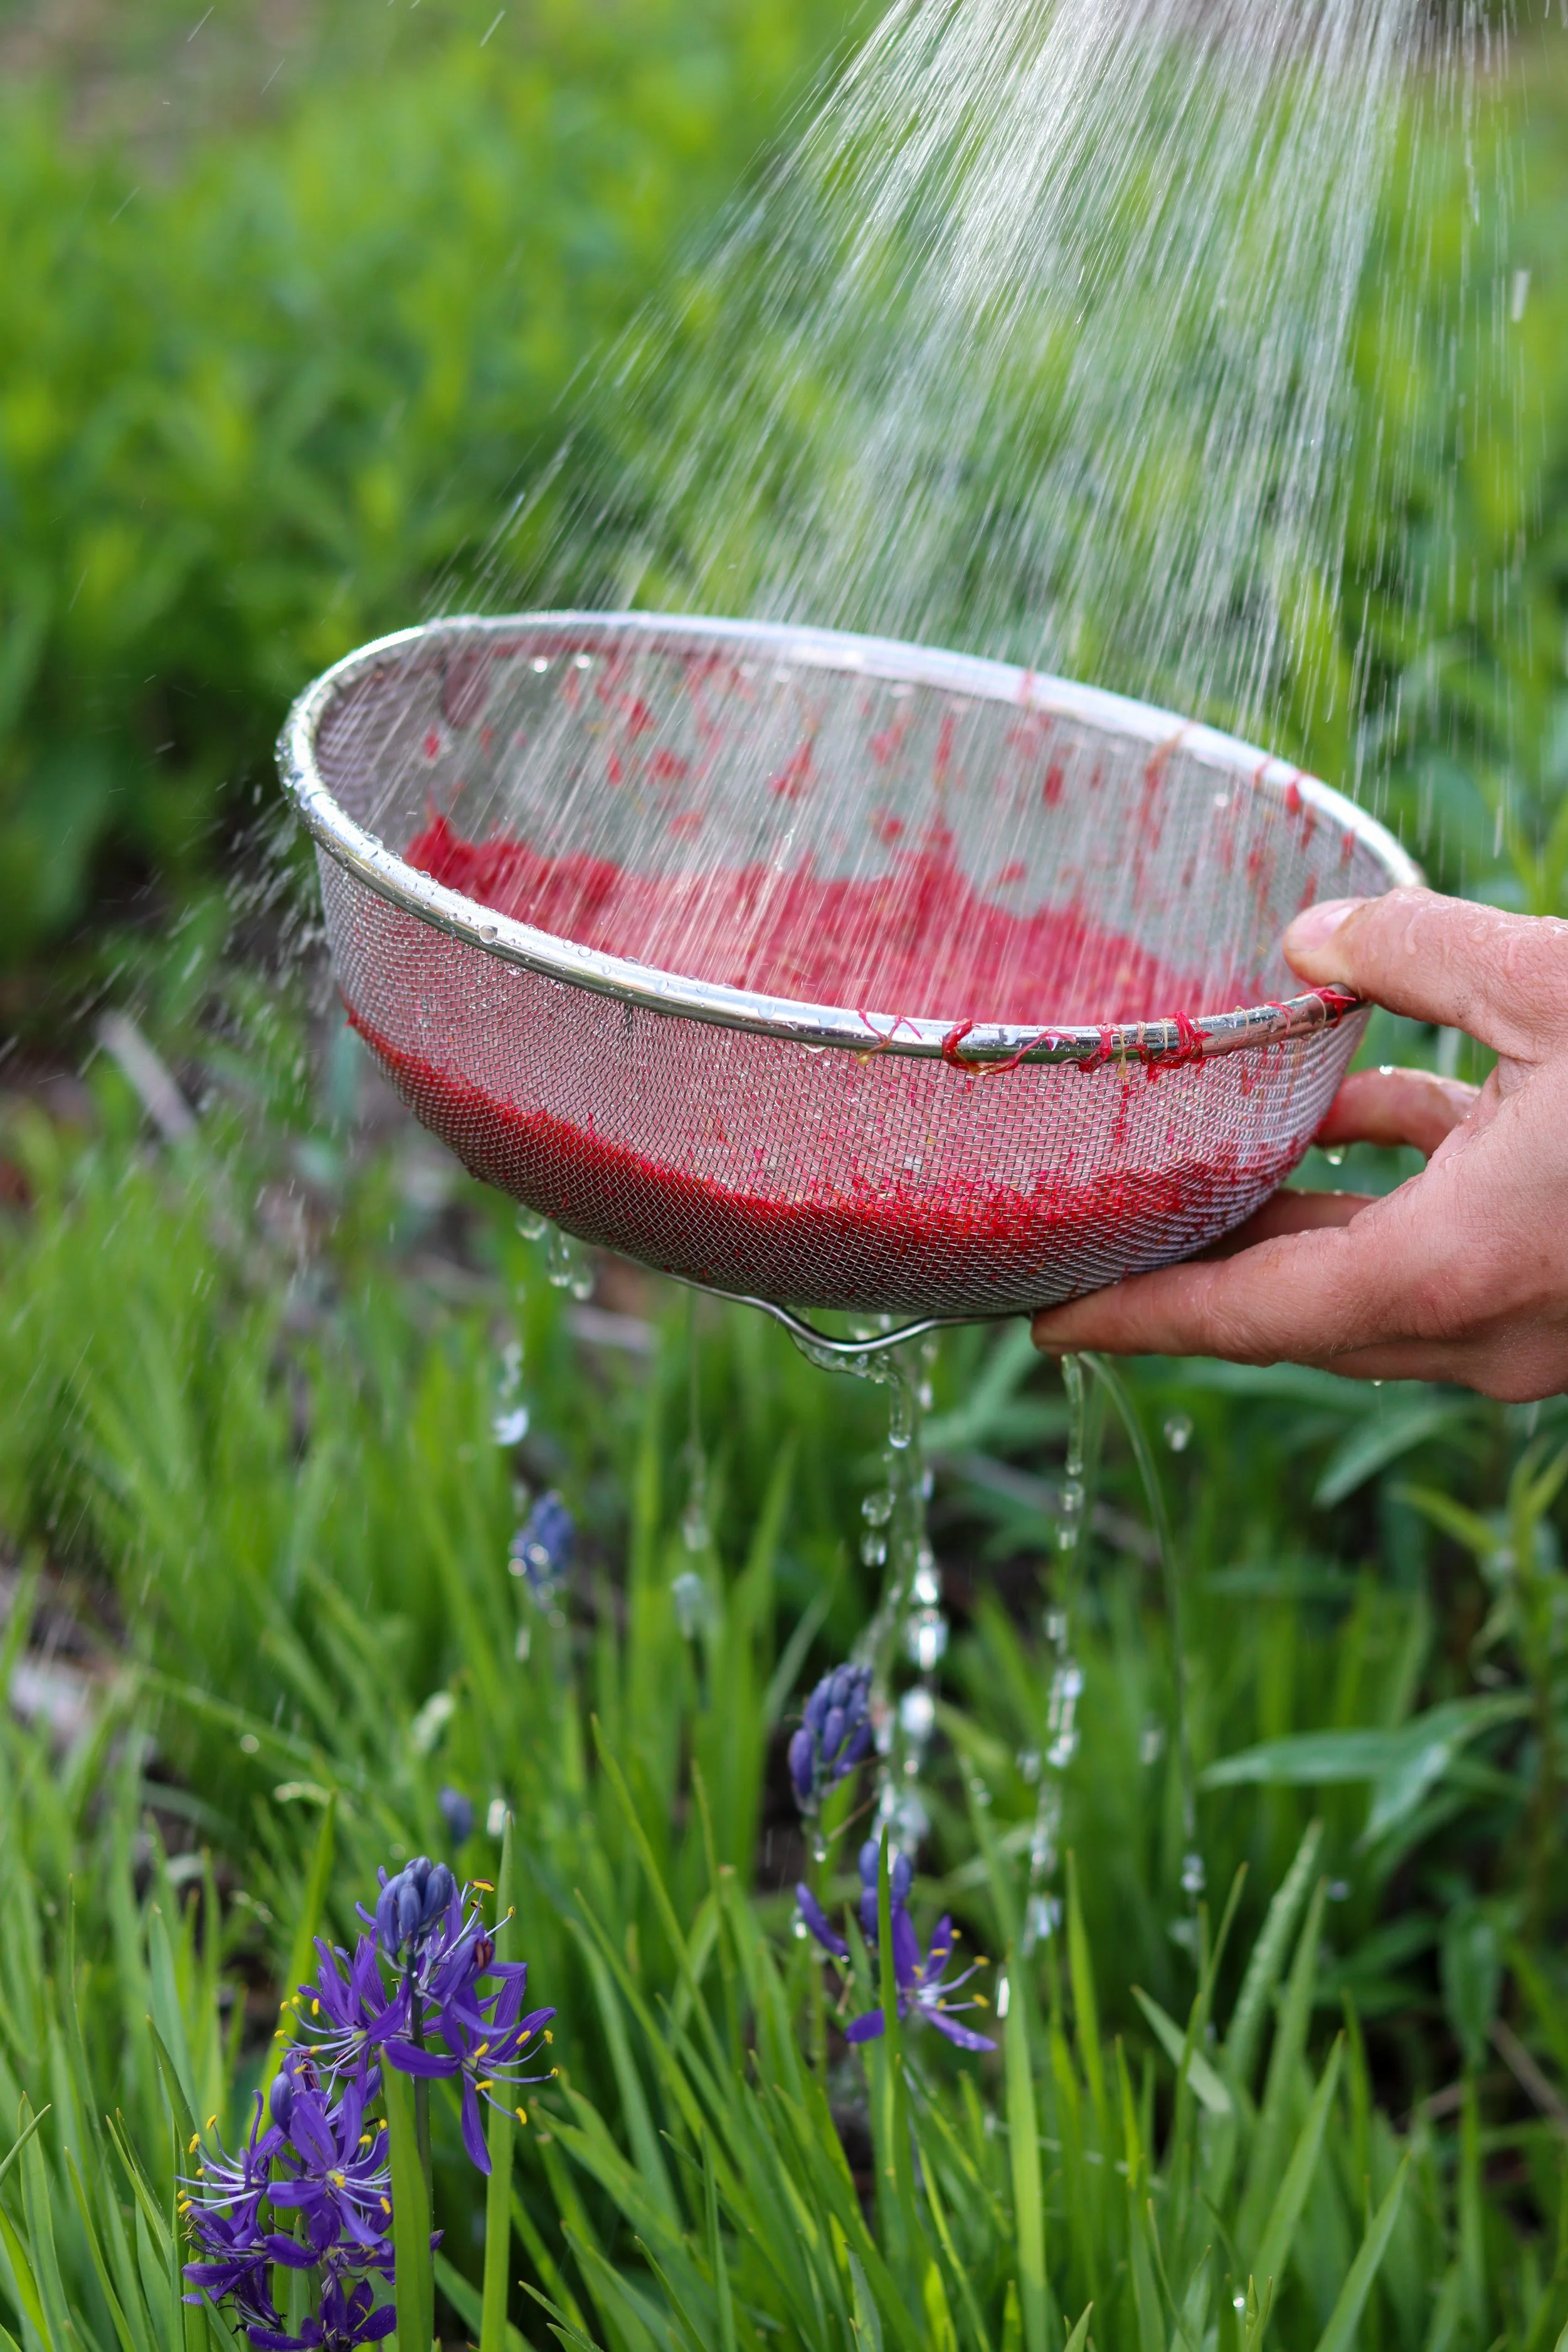
After your overnight soak (or multiple shorter extractions) strain the liquid through a fine metal sieve to separate the petals, which can be reserved for carthamin dye extraction. After straining out the petals, we like to briefly rinse them to remove any residual yellow dye on the petals. Because the yellow dye is mild, we rinse the flowers over our garden beds.
Dyeing with Safflower’s Yellow Flavonoids
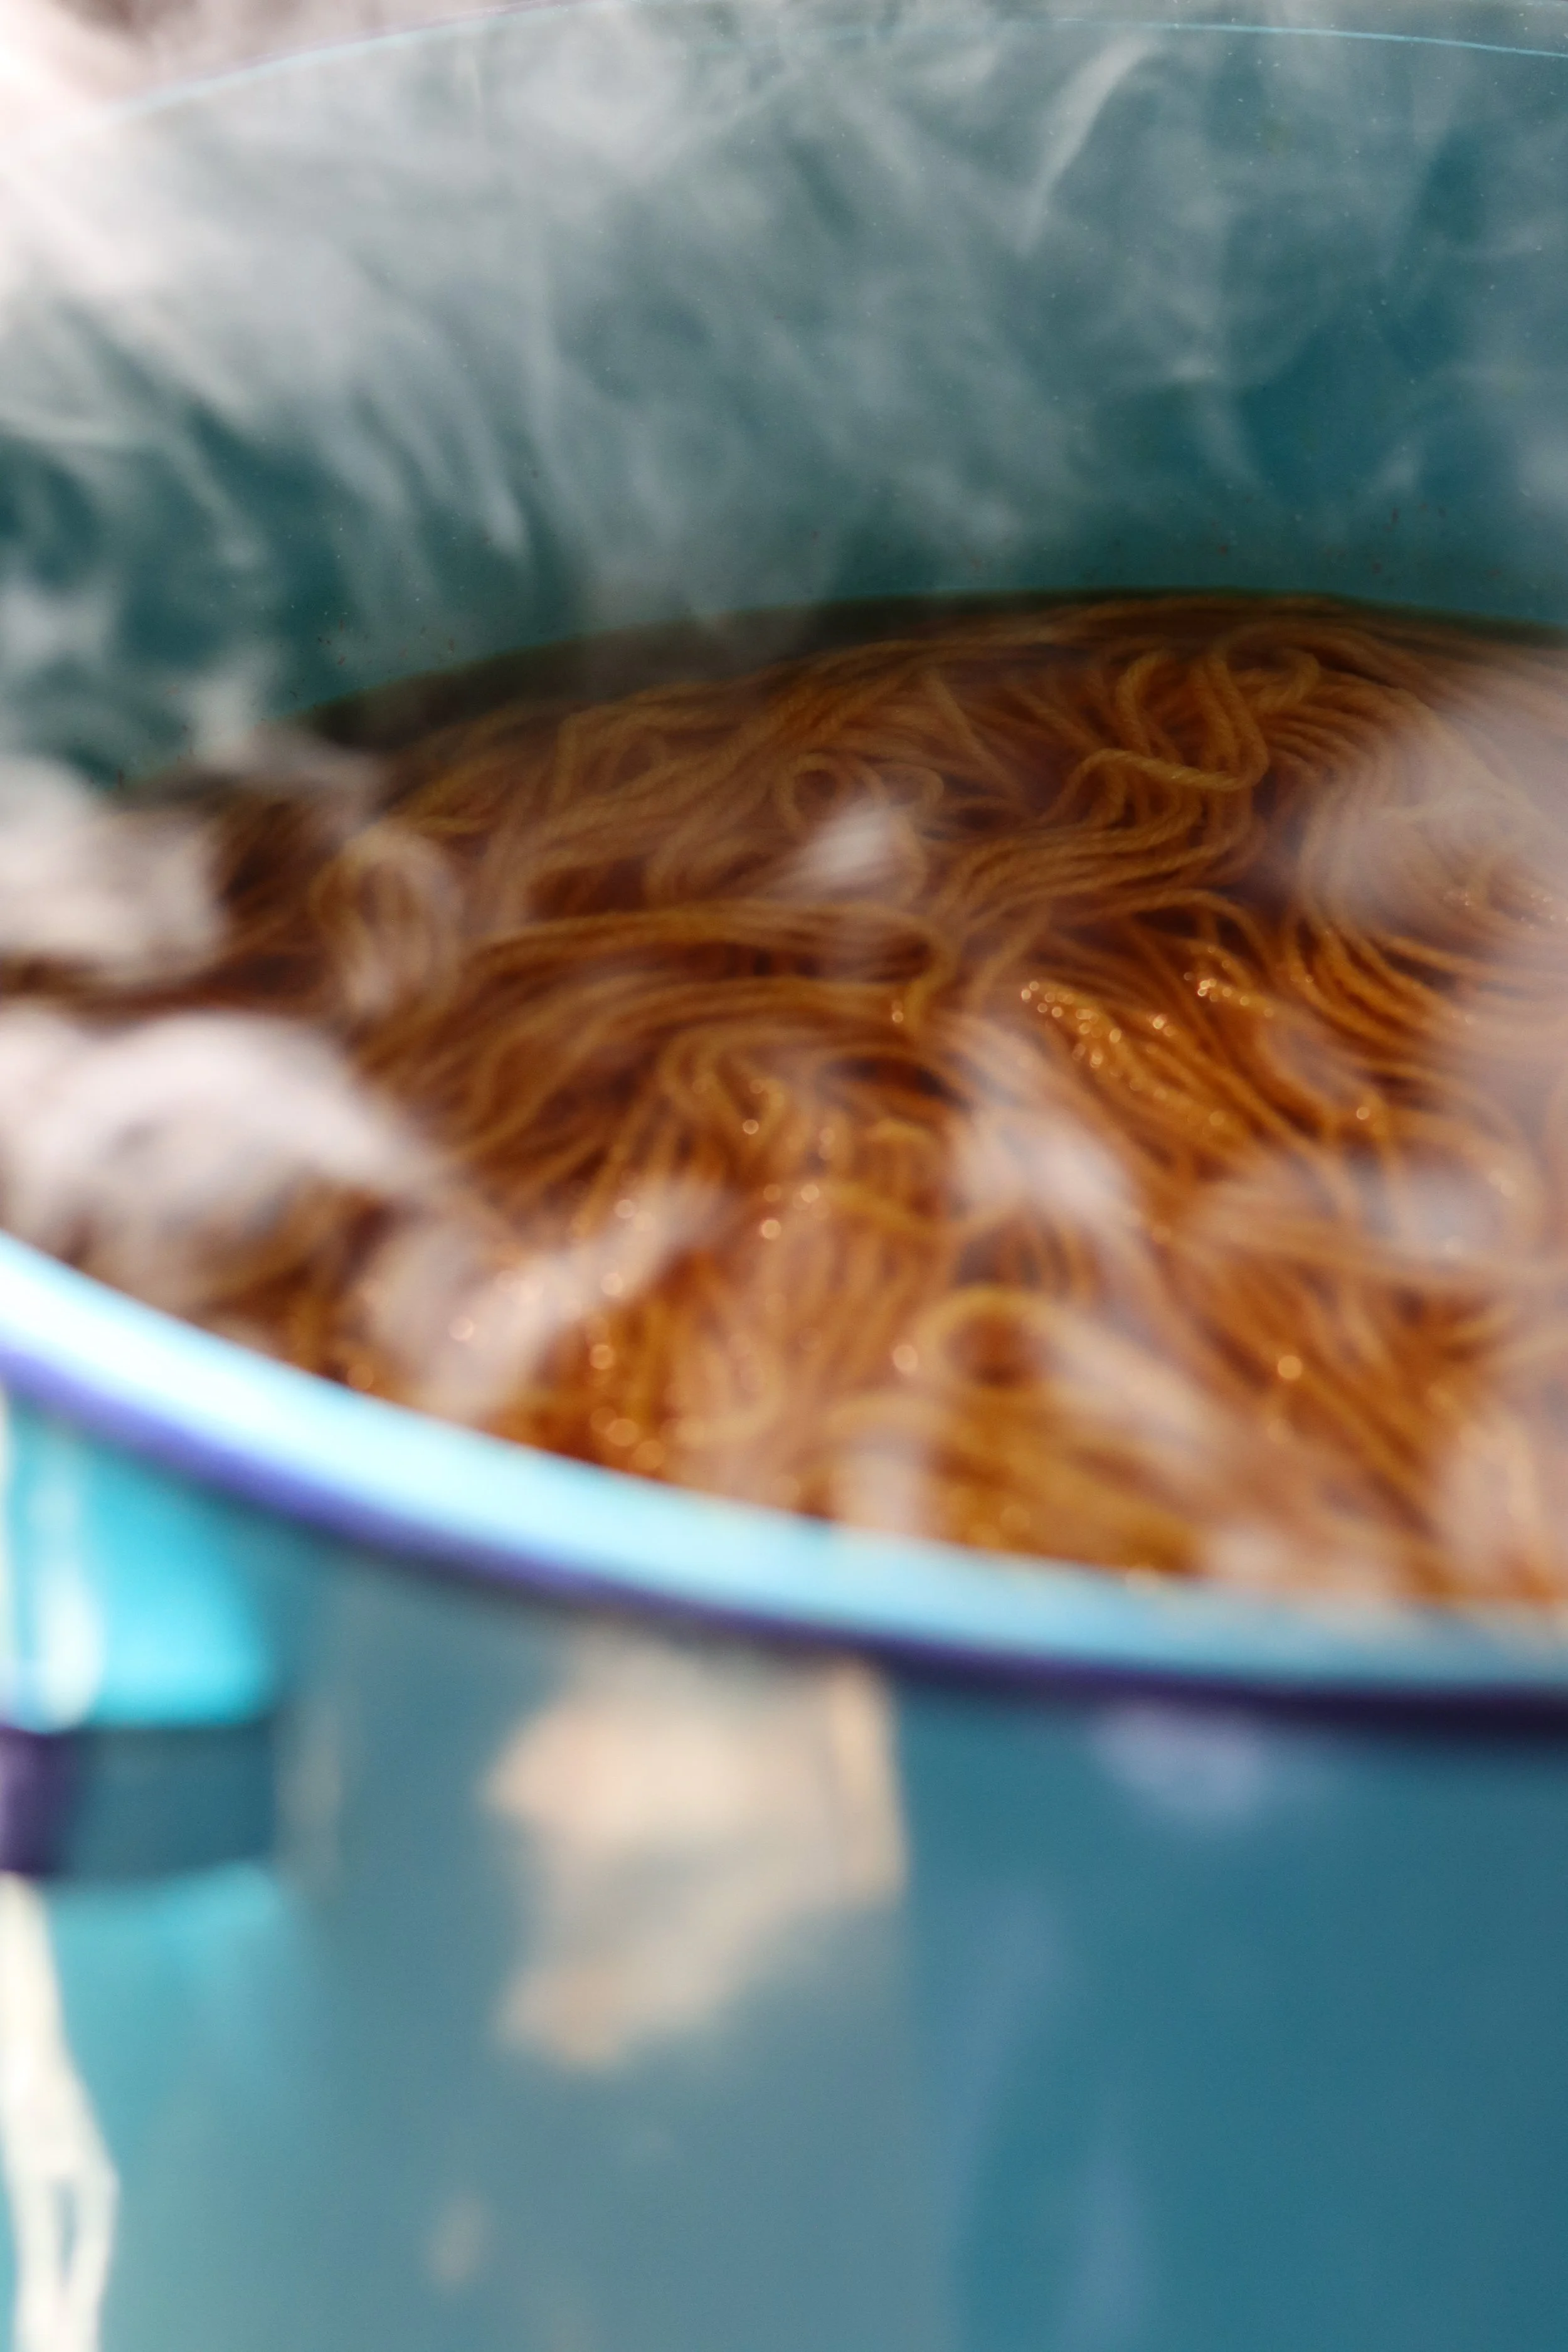
To dye protein or cellulose fibers with the yellow extract, gently heat your dye bath with pre-wetted, mordanted fibers, and then maintain the temperature just below a simmer. Stir occasionally and allow the fiber to absorb the dye for up to an hour or until the desired depth of color is reached.
While the yellow dye compounds from safflower can be used on cellulose, silk, and wool, we find the results on wool more vibrant and colorfast, making it our preferred fiber for this particular extraction.

Above: Safflower-dyed wool, knit into little baby mittens for a special little friend 💛🦉💛
DYEING CELLULOSE AND SILK PINK WITH CARTHAMIN DYE

Extracting Carthamin Dye
To extract the red pigment carthamin, you’ll need to add the petals that have had yellow pigment removed into an alkaline solution, as carthamin isn’t able to be extracted at a neutral pH. We raise the pH by adding small amounts of sodium carbonate (soda ash or washing soda) until pH strips indicate that a pH of between 10-11 has been reached (preferably 11, but not higher). Add your petals to the alkaline solution, and let the petals sit for a few hours at room temperature, stirring occasionally. You’ll know all the carthamin has been extracted when the petals have a tannish color, and the bright orange and pinkish-red pigments are no longer visible (refer to photos at the top of the dye section).
Dyeing with Carthamin
Once your dye has been fully extracted, strain out the petals. Next, slowly add white vinegar until pH strips indicate the pH is ever so slightly acidic (6-7). You can then add unmordanted cellulose or silk to the dye, and allow to sit at room temperature until all the dye has been absorbed by your fibers, or overnight for good measure. For an even color, stir regularly for the first two hours when the most pigment is being absorbed. After dyeing, rinse your fibers well, and keep them out of strong direct sunlight to prolong the color. Cellulose will take on a hot pink color, and silk will have a more coral hue.


Top Row: Slowly adding vinegar to the carthamin rich dye bath until a pH strip indicates a pH of between 6 and 7. Stirring to ensure the pH is uniform in the dye bath. Bottom Left: A saturated piece of cotton Bottom Right: Cotton being rinsed


The cotton bandanas shown above were dyed using 100% WOF, without having all of the yellow extracted first. The resulting color, seen dried on the right, is a soft peachy pink. The shirt below was dyed with just over 150% WOF. For both projects, we chose a tie-dye approach to help the carthamin pigment go further, concentrating color on exposed areas of fabric.
Prior to dyeing the shirt, we removed more of the yellow pigment through a 24-hour soak in a large pot of water. As a result, the dried shirt displays a clearer, cooler pink compared to the warmer tone of the bandanas.
Because carthamin is less lightfast than other pink dyes like madder or cochineal, Guy wears this shirt primarily as a nightshirt to help preserve the color. When it eventually fades, whether months or years from now, we’ll simply refresh it with another safflower dip.


“In safflower
Dipped many times, my robe
Worn morn after morn
Has familiar wrinkles, yet
Is all the more dear for that…”
SAFFLOWER AS AN HERBAL TEA
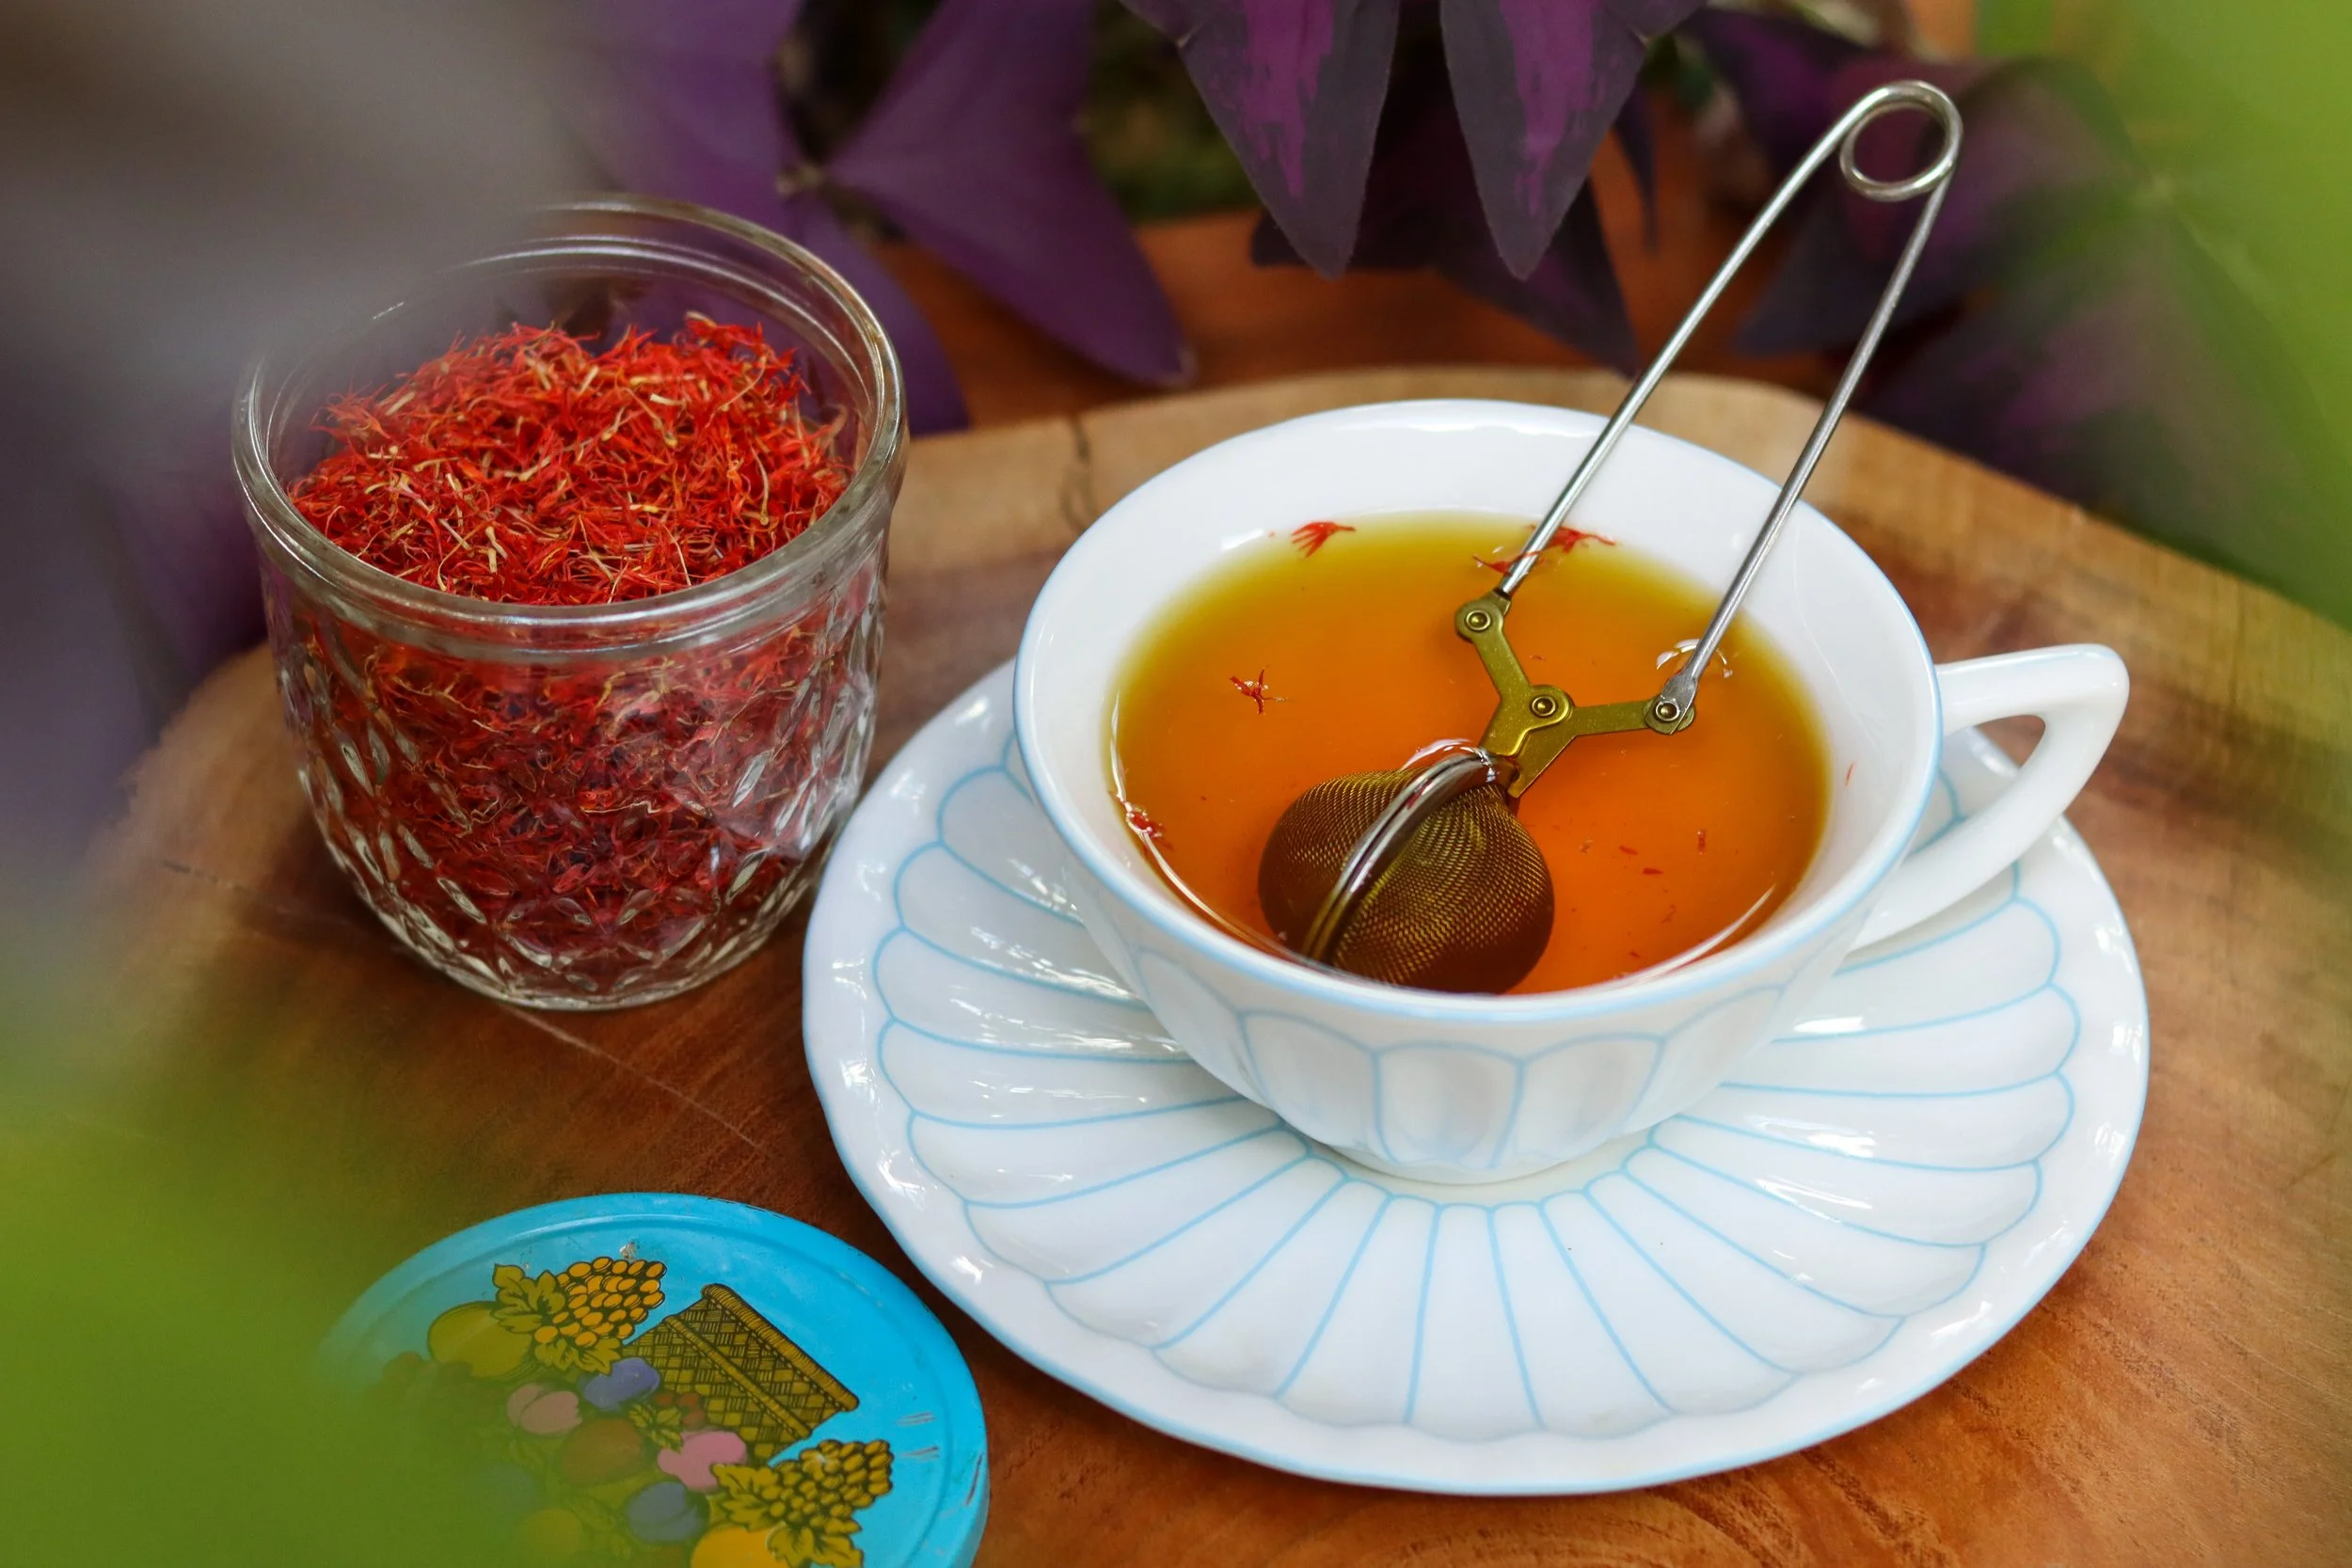
Dried safflower petals yield a subtly sweet, beautifully colored tea with a gentle floral flavor. After harvesting the flowers, it’s best to store them in a cool, dark place in an airtight container to maintain their freshness. Like all herbs, if not thoroughly dried before storage, they can become moldy or discolored. For tea, we put a generous portion of petals in a metal tea infuser, and steep for four or five minutes in hot water before sipping.
Safflower has been celebrated for its medicinal qualities for thousands of years. You can find a large review of traditional and modern uses for safflower in this article on the National Institutes of Health website. Due to a lack of comprehensive research, it is advised that those who are pregnant or breastfeeding consult a healthcare provider before drinking safflower tea.
DRYING SAFFLOWER FOR EVERLASTING ARRANGEMENTS
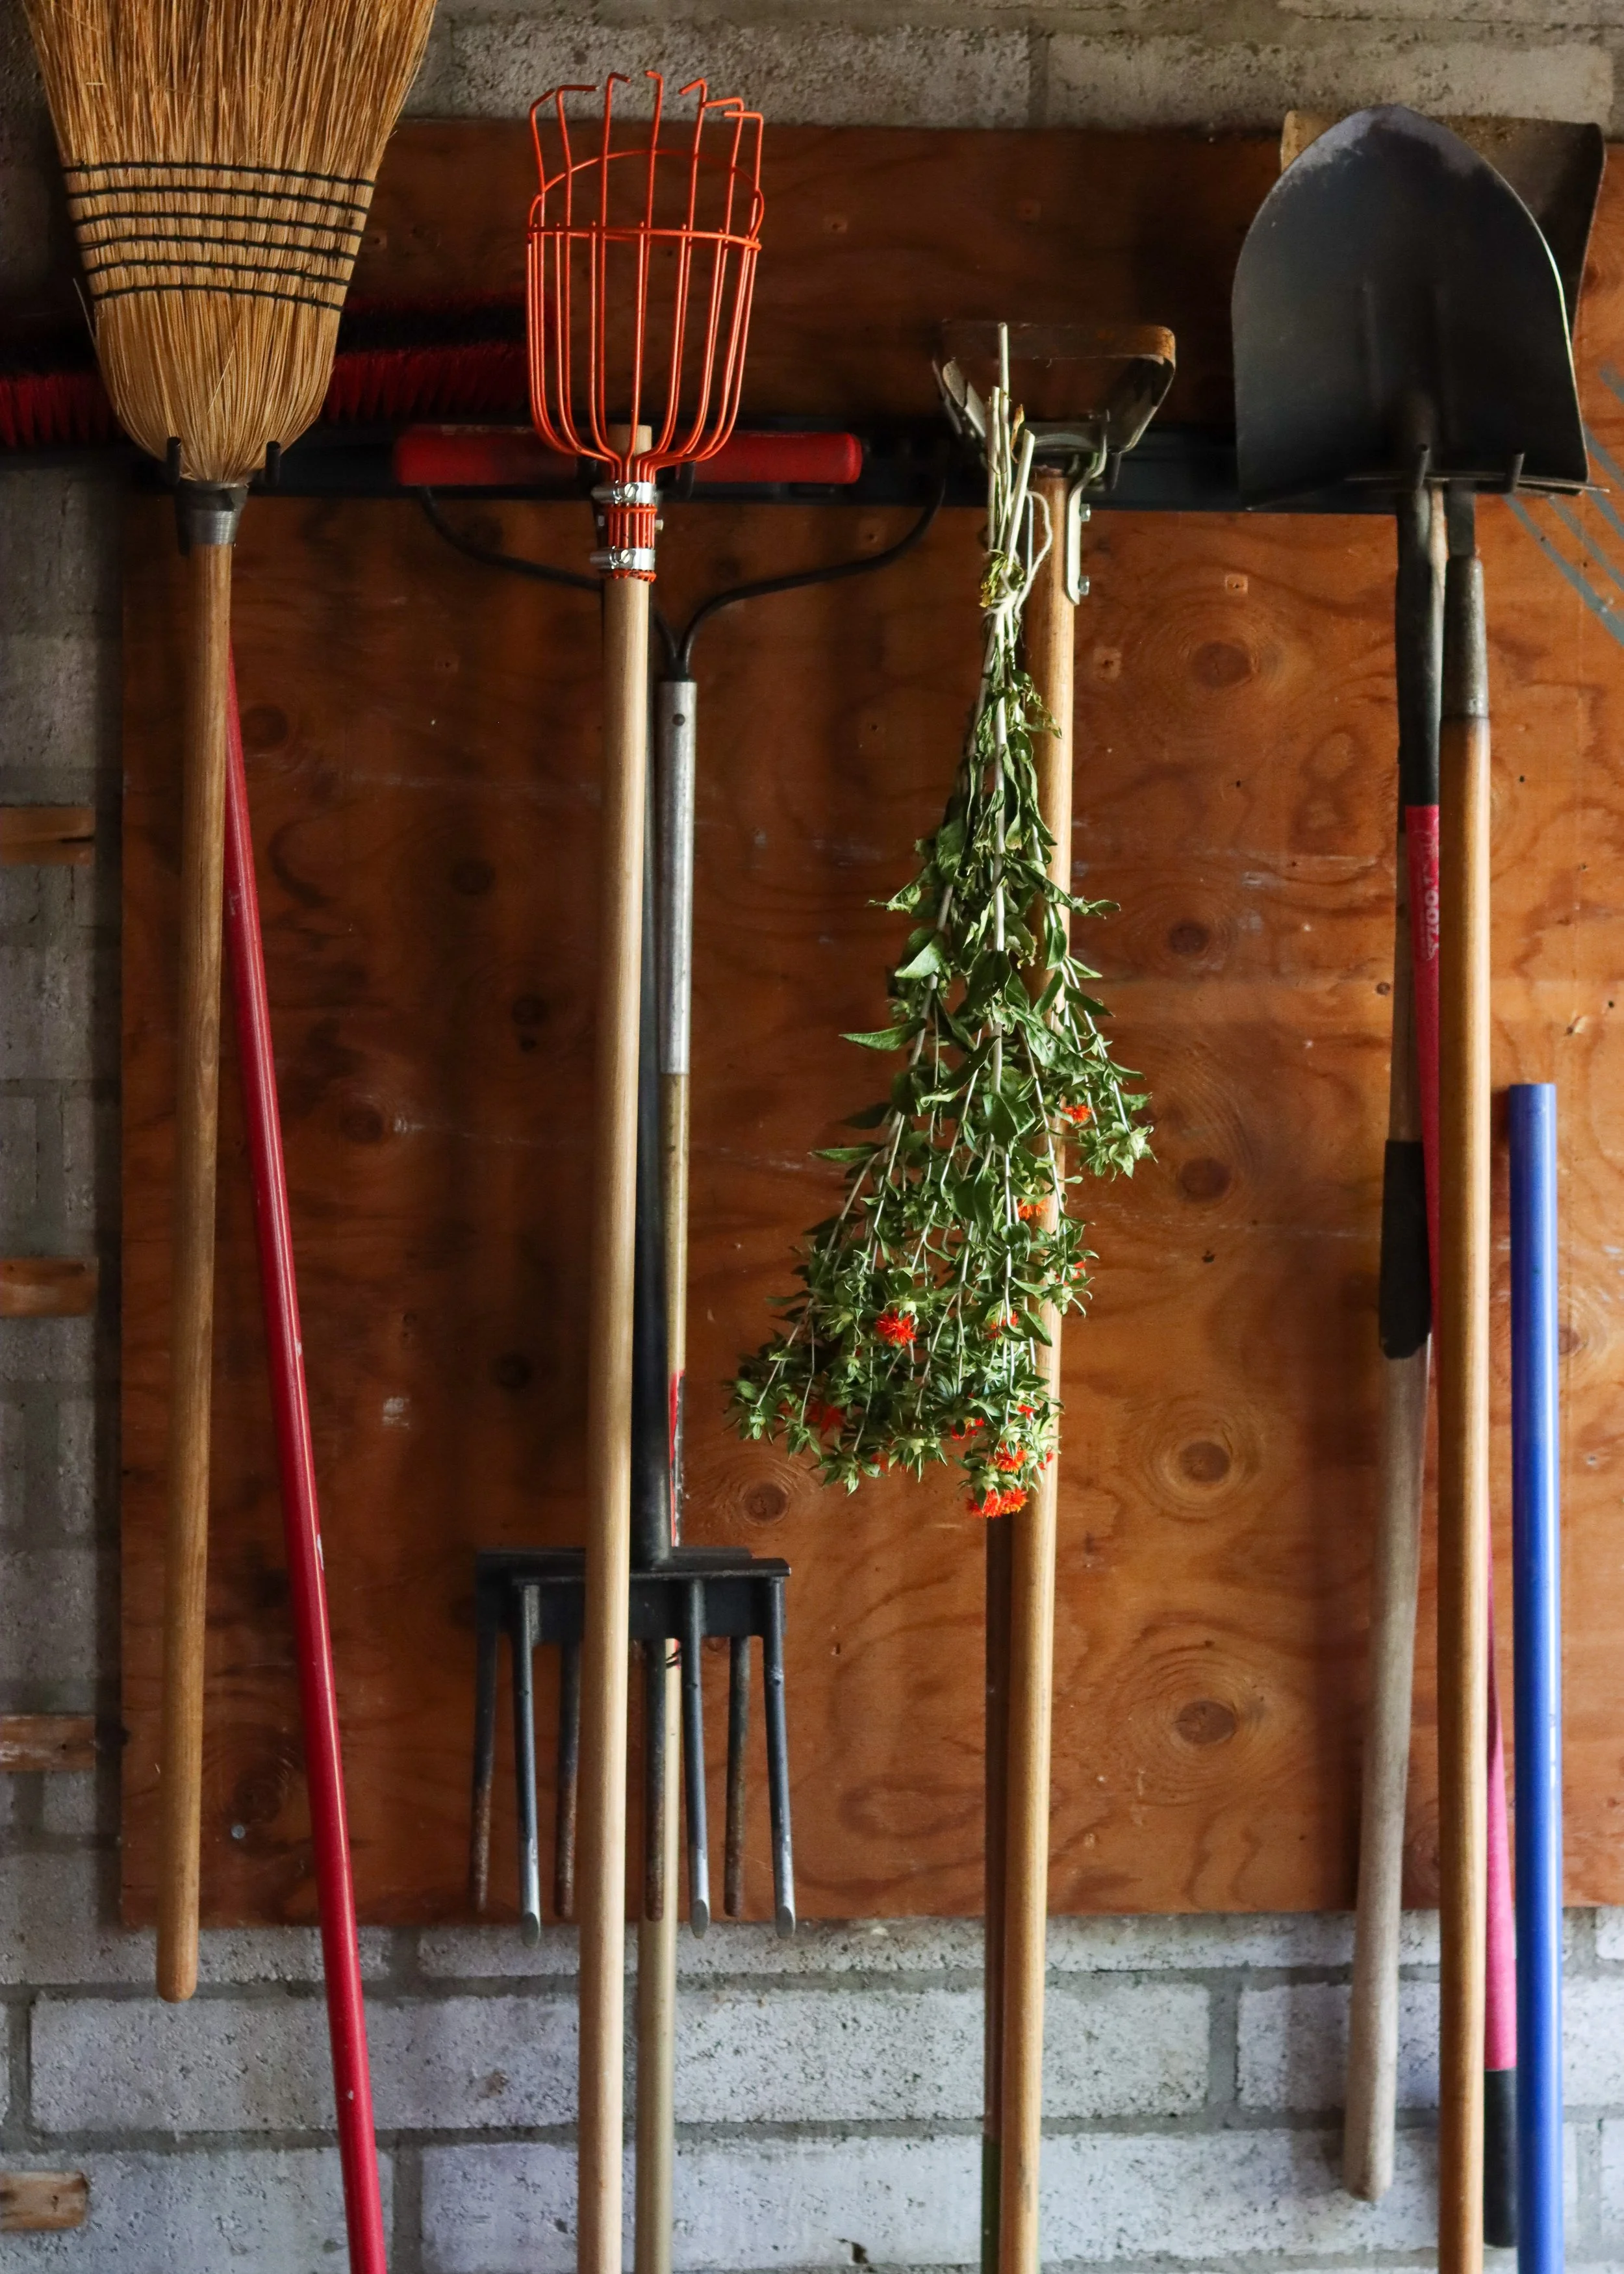
Safflower petals retain their vibrant color exceptionally well, making them ideal for dried flower arrangements. For the best results, harvest the blooms while they are fresh, then hang them upside down in a well ventilated area away from direct sunlight. Drying them upside down helps the petals keep a lifted, lively shape, like the flowers shown above, rather than drooping, as seen in the single bloom below that dried in the field.

Above: This droopy cutie-patootie dried in the field instead of upside down
SAFFLOWER AS A GARNISH

We keep a small mason jar of dried safflower petals in the kitchen, ready to sprinkle over soups, salads, desserts, or even cocktails. While the petals have a very mild flavor, they add a vibrant pop of color that can brighten up a dish or drink. They’re especially striking on creamy soups like leek and potato, on white-frosted desserts, or as a subtle, colorful touch on a tequila sunrise or paloma.
Safflower also has a long history as a culinary dye and a traditional substitute for saffron in many cultures (known as bastard saffron in some areas). Although it doesn’t share saffron’s distinct aroma or flavor, it imparts a similar golden hue. Here in the United States, it’s often sold in bulk in Mexican grocery stores under the Spanish word for saffron, azafrán.
Along with dried arrangements or safflower tea, using safflower as an edible garnish is a practical way to make use of a smaller harvest. Just a few plants can provide enough blooms to garnish many dishes.
We hope you enjoyed this post! If so, please consider signing up for our newsletter at the bottom of the page to get notifications when new blog posts are available. Also, you can find our safflower seeds here!